Showing posts with label little girls natural hairstyles. Show all posts

Sunday, January 18, 2015

6 Tips for Healthy Natural Hair Growth (Part Three!)


In our final post of this three-part-series we are going to discuss proper detangling and the use of excessive heat. If you missed the previous tips, you can check out part one here, and part two here

Tip #5: Proper Detangling

Proper detangling is crucial when it comes to retaining length. The best thing you can do for your child’s hair is to finger detangle before a comb or brush ever reaches those curly tresses. After washing your child’s hair, you will add your conditioner of choice (hopefully one with lots of slip!). You will begin with small sections by gently running your fingers through your child’s hair, feeling for any small knots. Gently remove them. Once you are finished finger detangling one section, you can use your wide tooth comb or Denman brush. Be sure to always start from the ends, working your way up until that section is completely detangled. Braid or twist the section and move on to the next. Never comb or brush your child’s dry hair unless it has already been completely detangled and stretched (see banding), be sure to use a moisturizer.


Tip #6: Avoid Heat

You’d be surprised at how often people are using heat on their child’s hair. Many parents and caregivers tell me they like to blow dry their child’s hair before styling. Not only does heat weaken the hair shaft, especially if proper heat protectant is not being used, but there’s a big risk with permanently damaging your child’s curl pattern. Once this is done, the damage cannot be reversed unless the heat damaged hair is cut off.  Blowdrying before styling is an unnecessary step that can easily be achieved by banding. Banding is a way to stretch the hair without the use of heat. If you must use heat, make sure you go about it the right way. Check out this post and this post for flat ironing tips.

I hope you have enjoyed this three-part series on how you can help your child grow long, healthy natural hair. While there’s nothing wrong with wanting long, Rapunzel-like hair, try not to put too much emphasis on length as it could create a complex in your little one’s mind. Be mindful of what your child wants and talk to your child about healthy hair care habits. It’s never too early to learn about caring for those beautiful locks, no matter what the length.

You can read all about Miss A's hair care routine by clicking here

Let's Connect! Facebook | Instagram | Pinterest | 

Saturday, January 3, 2015

6 tips for Healthy Natural Hair Growth (Part Two!)


Yesterday we talked about two important tips to get your child started on their healthy natural hair journey. Today, we are going to discuss the importance of protective styling and how it will help retain length.


Tip #3: Avoid Wearing the Hair Out/Loose

If your goal is long hair, I highly advise you to save loose styles for special occasions. This includes an afro, puffs, curls, twist outs... shall I continue? Kinky and curly hair is already prone to tangles. When the hair is worn out for an extended amount of time that only increases the potential damage you are unknowingly causing. Which brings me to our next tip...

Tip #4: Protective Styling

If you’ve been following our blog for a while then you know we can be pretty serious about protective styling. In fact, most of 2011 Miss A was wearing protective styles and that just so happens to be the year she retained the most length. We even had a couple of Protective Styling Challenges that year (shout of to all participants!).

So, what is a protective style exactly? Well, that really depends on who you ask. If you want my opinion, it’s any style that requires no rubber bands or hair accessories (aside from the occasional headband or no slip bow, see part one) and falls under the following category:  Two/three strand twists, box braids, mini braids/twists, cornrowed/twisted updo's. See photos below for examples of a few of our favorite protective styles:


You can use the search box to the left to view more protective styles on the blog.

Most people will probably tell you a protective style is anything that hides the ends of the hair so no damage is being done, or something along those lines. While they are not wrong for thinking this, I don’t completely agree. Buns, for example, hide the ends; however, the bun could be pulling at the hairline, and in Miss A’s case, causing terrible tangling. There will be a lot of trial and error and ultimately you will have to do what works best for your child's mane.

Don't forget to be careful with how tightly you style your little one’s hair. If they are in pain, don’t just chalk it up to them being tender-headed. Try to be as gentle as possible, otherwise it defeats the entire purpose.

For us, protective styles last anywhere from one to six weeks so always remember to continue to moisturize the hair while it’s braided or twisted up. Bee Mine Juicy Spritz is simple and effective.

Tomorrow we will discuss the final two tips in this three part series so be sure to stop by and check it out. I will also be answering any questions or concerns you all may have. So, if there's anything you'd like to ask, be sure to leave a comment.

Let's Connect! Facebook | Instagram | Pinterest | 

Wednesday, March 27, 2013

Easter Hairstyles for Little Girls with Natural Hair


Easter is right around the corner which means cute dresses and adorable hair-do's to match if you're anything like us! I know how hard it is looking for special occasion hairstyles for little girls with natural hair so I decided to put together a quick post to hopefully inspire your little one's Easter hair-do!


Twist Out/Knot Out's


Twist out with criss cross cornrows


Bantu-knot out with flat twists inspired by Naptural85

Cornrows and twist out

Twist out on 4b/c natural hair

Flexi-rod Sets

Cornrowed updo with flexi-rod curls
Flat twists with flexi-rod set in the back

Full flexi-rod set

Up-do's

Cornrowed updo

Cornrows and large two strand twisted updo

Cornrows and cinnabun updo

All Natural

Large flat twists into natural afro

Au' natural

Straight

Straightening thick 4b/c natural hair

Flat ironing long natural hair


There are many more hairstyles to choose from to please feel free to browse the blog or check out our Facebook page for thousands of hairstyles shared from all around the world!


Thursday, March 14, 2013

Little Girls Natural Twist Out - Step-by-step Instructions

Miss A's older cousin, Ky

Twist outs look great on all natural hair types and are absolutely adorable on little girls! I put together a quick picture tutorial for beginners. Hope it helps!

  • Start with washed and detangled hair. I decided to go the extra step and band Ky's hair as well just to give it a little length.
  • Part about a two inch section of hair with your fingers and add about a quarter size amount of your choice of product. I used Bee Mine Curly Butter on Ky's two strand twists. Don't worry about the white color showing up, it's from the product and it will fade away shortly. 

You can use code BBBSPRING for 10% off your Bee Mine Products purchase! :)

  • Split the section of hair into two even pieces.

  • Using both hands, begin twisting 1 section over the other. Continue this process until you get all the way to the end.


  • Once you reach the end of the two strand twist, roll the ends in one direction multiple times to make sure the twist does not come loose. This may not work on very thin/fine hair types. If your child's hair cannot hold a two strand twist by itself, you may need to use an ouchless ponytail holder.

Half way done!


I prefer keeping twists in overnight for best results but we didn't have much time so I took Ky's twists out after about 1 hour.


Ky loved the results! You can check out her sister Lil Bit's style with step-by-step instructions by clicking here.

Here's an older twist out I did on Ky last year.
You can view this full post with more details by clicking here.

Let's connect!
 |Facebook | Pinterest | Instagram (@beadsbraidsbeyond) 
| Twitter (@beadsbraidsblog) | Youtube |

Looking forward to seeing you there! :)

Friday, March 1, 2013

"Natural Kids Be Like" Follow us on Instagram!

We've been having fun on instagram lately. Check out some of our silliness and follow us on instagram. @beadsbraidsbeyond

We're also on Pinterest! http://pinterest.com/nikkiatbbb/

And we're on Facebook! http://facebook.com/beadsbraidsbeyond

And finally, Twitter! @beadsbraidsblog

Let's connect!

Enjoy!


Wednesday, January 16, 2013

Little Girls Natural Hairstyle: Curled Cornrows & Afro Barbie Set by Miss Teeny Fab Couture Review!


First of all, how adorable is this afro puff barbie tshirt and bow set? Love it! It's by Miss Teeny Fab Couture but we'll get back to that in a moment.

Let's talk about this simple little girls natural hair style! 

Instructions:
  • Her hair hair was previously moisturized with Bee Mine Luscious Moisturizer and banded before styling. If you are not sure what banding is, it's a simple way to stretch the curls without the use of heat, check out this post for more info. I find working with stretched hair a lot more easier, you don't have to do it though. Totally up to you.
  • With a metal rat tail comb, I parted a large circle on the top of her hair leaving some hair out on each side and tied the back section off.
  • Working with just the parted circle section of hair, I began parting a section of hair to cornrow starting at the front of her forehead going all the way around the circle. Somewhat of a swirled effect.
  • I applied a little Bee Mine Curly butter to each section and proceeded to cornrow. I continued parting in that swirl effect within the circle until the top section was complete. If you do not know how to cornrow make sure you check out our cornrowing for beginners post
  • Once the top was complete I moved on to the back and simply parted front the front of her head down to the nape of her neck, added curly butter and cornrowed. At the end of each cornrow I added a flexi-rod about half way up the braid to curl them.
  • I left the flexi-rods in for about 30 minutes, once I took them out the braids were loosely curled.
That's it! Like I said, very simple if you know how to cornrow and totally adorable for a little girl. Especially with a super cute bow on the side! Feel free to accessorize however you like.

If you're interested in trying Bee Mine Products (our favorite!!!) don't forget we have a reader discount code! You can use code BBBSPRING for 10% off your purchase only at www.beemineproducts.com Happy Shopping!


On to the review... Miss Teeny Fab Couture generously sent Miss A this adorable shirt/bow set and we both fell in love with it! It's all very well made, even after washing the shirt still looks awesome. Miss A received so many compliments on it. I mean, it's not often that you see an afro barbie set! I love the 3d bow on the shirt, too cute for words!

Miss Teeny Fab Couture makes pretty much anything you want so make sure you stop by and "like" their facebook page! >>>HERE<<<


Thursday, November 29, 2012

Straightening Long Naturally Curly Hair

Please note: My daughters hair did not look like that before straightening. That's just a picture showing you what her curls look like.
I finally straightened Miss A's long natural hair. Can you believe it? I sat her down and I told myself I would try one section and if that one section was not straight after one pass of the flat iron, I would quit. Well as you can see, it worked! And the best part, the actual straightening process only took roughly 40 minutes. #Winning

So I'm sure you want to know how it was done, right? It's not as difficult as you may think...
  • I washed her hair a few nights before using Bee Mine Products. Don't forget you can use our reader discount code: COLDBBB for 10% off your purchase only at Beemineproducts.com
  • After washing and detangling, I moisturized her hair with our favorite product, Bee Mine Luscious Moisturizer. Click here for Miss A's full hair care routine.
  • I banded her hair immediately after moisturizing in two sections. Click here for Banding F.A.Q.
  • The following day I removed the bands, detangled and put her hair in one banded ponytail going straight down her back.
  • On day three it was time to flat iron her hair but first I applied a small amount of extra virgin coconut oil to her hair to protect her curls from any heat damage. Grabbing a very small (about 1 inch in width) section, I brushed the section with our Denman D3 brush and ran the flat iron down the section from root to tip.
  • I used a pink Hana Elite 2 inch flat iron that was gifted to us from Misikko.com a while back. Absolutely love this flat iron. I kept the flat iron around 300 degrees and continued this process until complete, which again only took about 40 minutes.
Flat iron used, only we used a 2 inch made for thicker hair.

I think banding her hair made the biggest impact. Her hair was already stretched out quite a bit thanks to banding. If you plan on straightening natural hair any time soon, band the hair for a couple of days first instead of blow drying to reduce the amount of heat used on the hair.

Bed time routine has been very simple. I have been placing her hair in 1 or 2 twisted ponytails or one loosely banded ponytail, nothing special.

Please feel free to ask any specific questions.


Don't forget to "LIKE" us on Facebook! We have a new page! www.facebook.com/beadsbraidsbeyond

Sunday, November 11, 2012

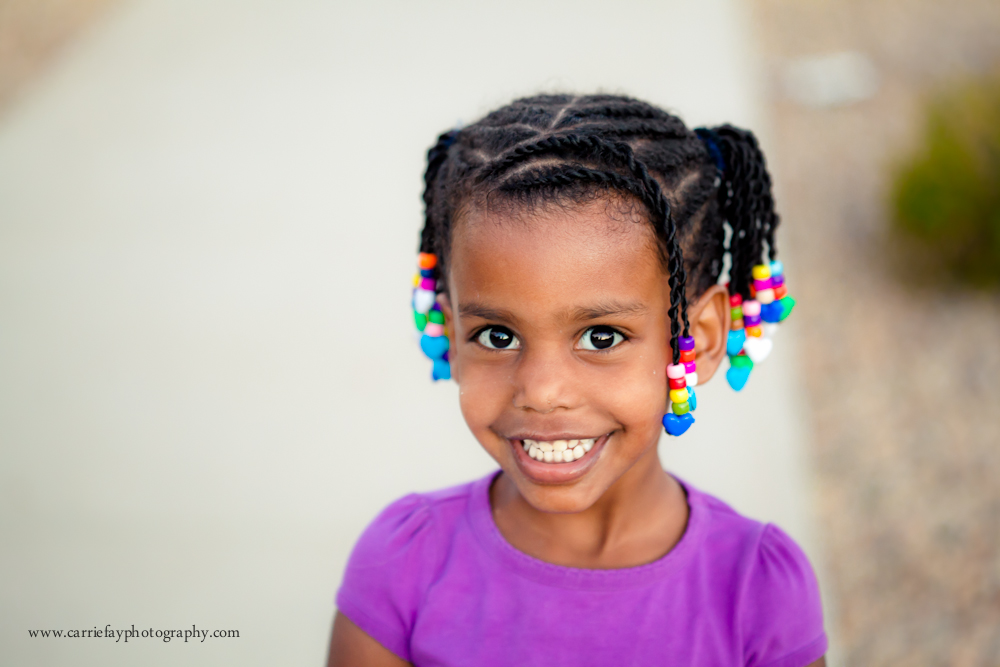
Little Girls Natural Hair Style: Flat Twist Ponytails with Twisted Bangs & Rainbow Beads


By: Carrie Fay of Amaro Baby

With hair as amazing as Violet's, it's easy for me to get carried away with new styles.  Sometimes I lose track of the fact that my daughter is only 3 years old and does not (in my opinion) need to look any older thanks to the too-fancy styles that I can't seem to resist.  So it's refreshing when we find those styles that are simple enough for me to do, sturdy enough to last a week or two, and CUTE enough to make her look like the adorable 3 year old that she is.  

This is one of our "go to" styles:  Flat twist ponytail(s) with twisted bangs and rainbow beads.  


Flat twists have always worked better on Violet's hair than cornrows for keeping the fuzzies away, and some type of bangs just seem to suit her.  It adds a feminine touch and protects her hairline better.  Beads aren't something we normally do, but when we do them, it's usually a "color explosion" kind of thing.  (Once, my five year old son asked me, "Can we just put Violet's hair back the way God made it?  You know, with rainbow beads??")

We opted for heart snaps at the end of each twist this time.  Last time we did beads, we used rubber bands and saw a bit more breakage on the ends than I would like to see.  Snaps fall out occasionally, but I'd rather that than cause damaged hair.  


Anyway.  This is our style for the week.  The pigtails and colors suit her fun personality and her age.  And most importantly, Violet is a happy camper.  She loves her rainbow beads, skipping and jumping around the house to feel those pigtails swinging (and as a direct result, we can hear every. single. step she takes... another wonderful perk of a head full of beads!).  

Have a great week, everyone!  


Monday, November 5, 2012

Top 10 Most Popular Natural Hair Styles for Little Girls


Braids, twists, cornrows, twist outs, beads, oh my! I know how overwhelming it is looking for natural hair styles for little girls on our blog with hundreds of styles to choose from. I'm here to share with you the top 10 most viewed (on Beads, Braids & Beyond) natural hair styles for our curly and kinky haired gals!

Number 1 - Natural Hair Styles for Little Girls: Cornrows & Twist Out - Flat Twists & Twist Out
I guess it's no surprise that a simple but pretty hair style like this one is number one at 44k+ views. This style is very easy as long as you know how to cornrow. Basic cornrows with a twist out topped off with some cute bows from Gymboree and your little lady is good to go! Read more...


With 28k+ views and counting this post showcasing three completely different little girls hair types comes in a strong second. Cornrows, twist outs, puffs, what's not to love here? Read more...


Over 21k+ views! As you can see, cornrows and twist outs are very popular for African American and biracial little girls. I'll echo what I said for number 1, this style is very simple as long as you know how to cornrow. The cornrow pattern is slightly different here but nothing too intricate. Read more...


One of my personal favorite hair styles for my little girl! Coming in fourth at 20k+ views. Inspired by singer and actress  Jill Scott and the beautiful Tiashauntee of Her Best Hair. Not only is this style cute, but it stays put for up to two weeks if cared for properly. We love protective styles for little girls as long as they are not done too tightly. Read more...


Number 5 - Natural Box Braids
Ah, yes. Back to the basics. Over 18k+ views, natural box braids comes in at number 5! What little girl doesn't love to swing her braids? Not a care in the world. Dress the braids up with beads or barrettes or keep it simple with bows or a headband. Curl the braids. Put the braids in ponytails. The possibilities are endless! The best part? They can last 4+ weeks with proper care! Happy mommy and child! Read more...


Stop by later this week to see the remaining styles in our Top 10 Most Popular Natural Hair Styles for Little Girls series and see if your favorite style made the cut!

Of course these are just the top 10 most viewed styles on our blog so these may not be your top 10 hair styles for natural little girls. 

I'm curious to know; did your favorite hair style make the list? If so, which one? If not, what is your favorite natural hair style for your little girl? Better yet, feel free to share pictures of your favorite style on our new Facebook page, Beads, Braids & Beyond. I look forward to seeing you all there!