Showing posts with label natural hair. Show all posts

Friday, August 16, 2013

Bee Mine Products Back to School Sale!


Our FAVORITE hair products is having a BACK TO SCHOOL SALE! Starting tomorrow, Friday, August 16th - August 18th. Receive 20% off your purchase using discount code: BTS13BBB only at www.beemineproducts.com

They are also introducing their new curly butter scent, Kiwi-Strawberry... I can't wait to try it!!!


Thursday, March 14, 2013

Little Girls Natural Twist Out - Step-by-step Instructions

Miss A's older cousin, Ky

Twist outs look great on all natural hair types and are absolutely adorable on little girls! I put together a quick picture tutorial for beginners. Hope it helps!

  • Start with washed and detangled hair. I decided to go the extra step and band Ky's hair as well just to give it a little length.
  • Part about a two inch section of hair with your fingers and add about a quarter size amount of your choice of product. I used Bee Mine Curly Butter on Ky's two strand twists. Don't worry about the white color showing up, it's from the product and it will fade away shortly. 

You can use code BBBSPRING for 10% off your Bee Mine Products purchase! :)

  • Split the section of hair into two even pieces.

  • Using both hands, begin twisting 1 section over the other. Continue this process until you get all the way to the end.


  • Once you reach the end of the two strand twist, roll the ends in one direction multiple times to make sure the twist does not come loose. This may not work on very thin/fine hair types. If your child's hair cannot hold a two strand twist by itself, you may need to use an ouchless ponytail holder.

Half way done!


I prefer keeping twists in overnight for best results but we didn't have much time so I took Ky's twists out after about 1 hour.


Ky loved the results! You can check out her sister Lil Bit's style with step-by-step instructions by clicking here.

Here's an older twist out I did on Ky last year.
You can view this full post with more details by clicking here.

Let's connect!
 |Facebook | Pinterest | Instagram (@beadsbraidsbeyond) 
| Twitter (@beadsbraidsblog) | Youtube |

Looking forward to seeing you there! :)

Thursday, November 22, 2012

Bee Mine Products Black Friday Sale!

Click to enlarge

OUR FAVORITE HAIR PRODUCTS! Bee Mine Products Black Friday Sale starts TONIGHT at 10pm EST! $20 minimum purchase. Early bird discount tonight for 30% off! Use redemption code: BBB23BLK at check out! 25% off all day tomorrow. These sales don
't happen often so take advantage while you can!www.beemineproducts.com Please allow 7-10 days for your order to process as these hair products are hand made. :) Discount can not be combined with any other offer. Have a happy Thanksgiving! 

Monday, October 22, 2012

Miss A's 7th Birthday...in the hospital?!

Hi everyone!

I know it's been a while. There have been so many changes going on in my life lately that I don't even know where to begin!

Let me first start by saying I'm sure most of you noticed our Beads, Braids & Beyond Facebook page is gone. I don't know why. I don't know how. It has saddened me and I was quite depressed over it. I wasn't even sure if I wanted to make another one but I did. We're nowhere near our 40k + likes but I know with your help we can get there. Please go like the new page www.facebook.com/BeadsBraidsBeyond and share it with your friends. Thank you so much!

I guess I'll just cut to the chase, Miss A's 7th birthday was last week. After work I took her to a new game room where we live and she had a blast. It was nice just spending some 1-on-1 mother/daughter time. I got a new job a couple of months ago so time has been limited. We try to enjoy every moment we have now that's for sure!


Birthday braids with beads
The next day I was at work and received a call. Miss A had just had a seizure. Many of you know Miss A was diagnosed with epilepsy last Spring. Read more about that here. I grabbed my keys, eyes full of tears and rushed out the door. As I was in a hurry driving to the hospital, the ambulance was rushing her to the emergency room. Once I arrived, she was sleeping. She gets very sleepy after having a seizure, which seems to be pretty common.

Always smiling
Miss A was in the hospital for 4 days. They did an MRI and a 24 hour video EEG. The MRI results were normal. The EEG was abnormal, which was to be expected. The neurologist said she had about 6 "starring spells" or "mini seizures" within the first 2 1/2 hours which can easily go unnoticed as they only last about 10 seconds each. He increased her medication so we're home now and hoping and praying for the best. 

I'd like to take a moment to thank you all so much for your thoughts and prayers. We truly appreciate it!

Please don't forget to go "like" our new Facebook page!


Monday, July 9, 2012

Big Carefree Natural Curls


I received several questions on our Facebook page about how I got Miss A's curls to look like this and how she was able to achieve her second day hair so I thought I would make a quick post explaining how we achieved her big carefree curls.

After washing and detangling her hair, I applied a generous amount of Bee Mine Luscious Moisturizer through her wet/damp curls with my fingers, from root to tip. I did not brush the product through. I continued to rake the product through (raking is key!) until I felt it had been evenly distributed. 

Once her hair dried it looked like this:

Later that night I gathered her hair in a loose ponytail on top of her head and created a messy bun, tucking the ends under. It's important for her to not sleep with her curls out. Once she lays on them they will tangle up terribly and become matted pretty quickly. When we want second day hair I will either place it in a high bun or put a few loose braids in her hair. 

The next day I removed the bun and her curls looked like this (see picture below). The only change I made was pinning the middle section of hair back for a different look.


Please note that if you try this (just using a moisturizer and raking) the curls will not be perfect. There will be frizz. Embrace it and learn to love it! As you can see, it's a beautiful thing.

Don't forget to "like" us on Facebook!


Saturday, July 7, 2012

Criss-Cross Cornrows with Two Strand Twist Out


Hey everyone! I hope you all had a nice 4th of July. I decided to keep Miss A's 4th of July hair style fairly simple and go with criss-cross cornrows going half way back into two strand twists. Read below for more info on how this style was achieved. 

First, I washed, detangled, moisturized (with Bee Mine Luscious Moisturizer and Virgin Coconut Oil on top) then banded. You can read all about how I do that and what products I use by clicking here.

After Miss A's hair dried I removed all of the bands and parted her hair from ear to ear. I tied the back section off and began working on the top section. At an angle, I parted two straight sections and in those straight sections I parted 3 individual sections to begin the criss-cross cornrow. You can see how I criss-cross cornrow by clicking here. I used Bee Mine Curly Butter on each cornrow. 

I left the remaining hair loose at the end of each cornrow until I had 2 cornrows side-by-side then I applied a generous amount of Bee Mine Curly Butter to the remaining hair and twisted the two sections together.

After the top section was complete I moved on to the back. I parted large squares, applied some curly butter and twisted each section together. I rolled the ends of each twist between my fingers to make sure the twist did not unravel.

After a couple of hours of letting the two strand twists set I carefully unraveled each twist, starting from the end of the twist and working my way up and viola- A beautifully defined twist out! See pictures below.

Don't forget to "LIKE" us on Facebook!


Saturday, May 26, 2012

Flat Twists into Side Ponytail

click to enlarge

Just a quick 'do. Two strand flat twists going into side ponytail.

School is out in about a week so expect many more updates to come. :-)

Monday, April 16, 2012

Guest Post: Straightened Natural Hair for a Cut

By: Rae of Tweeny Hair

The ends of Syd's hair have been looking kind of rough for a while now. Several factors joined together to cause that damage, including the cold, dry winter, more "out" styles as she gets older, and the fact that Syd is learning to do her own hair. Let's face it - natural hair in the hands of a beginner is probably going to get a little damaged. No biggie, though. We just decided to cut the damaged ends off and keep moving. It's only hair...it will grow back in no time.

I usually trim her hair while it is in small twists (you can see a post about that HERE), but this time I decided to straighten it with a flat iron and then cut it. After all, it had been over 2 years since Syd's hair had been straightened. We were both interested in seeing how it looked all straightened out. Here's what we did:

Syd washed her hair and I detangled it, added some Bee Mine Luscious Moisturizer, and banded her hair overnight.

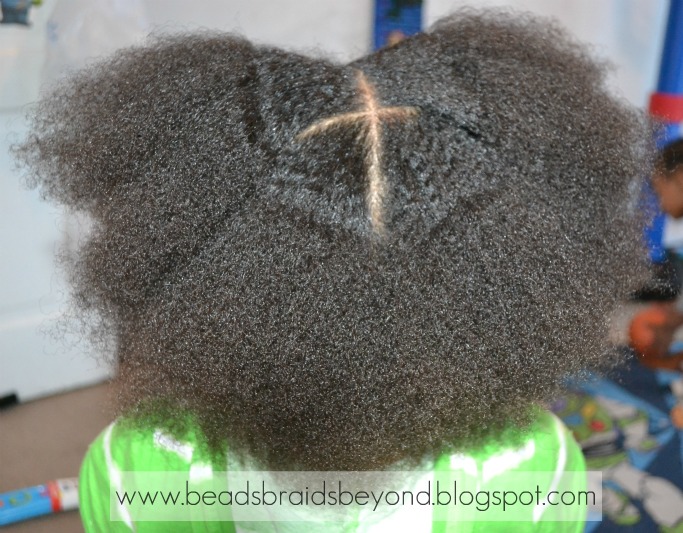
Starting in the back, I removed one section of bands. I added some heat protectant and used a flat iron (set to med-high) on somewhat small sections of hair at a time. I tried not to go over each section more than once, but I did need to make a second pass on a few sections. Bottom line, I used as little heat as possible to get the desired results. This took the first back section from this:

to this:

(Yes, I did this while we were both sitting on the floor....lol)

I then repeated the process for the other 3 sections of banded hair. When I finished, I was actually shocked that her hair reached her waist. I didn't realize it had gotten quite that long!

I let her wear her waist-length hair down for a day, but the following day I followed through with her hair cut. Instead of taking her to a salon, I opted to cut her hair myself. If you choose to do this, I cannot stress enough the importance of using hair shears. Do not use your regular household scissors, as they are not sharp enough to cut your hair cleanly. They can tug and pull at your hair as you're cutting, and you will have damaged ends on the hair that has just been cut. Talk about counter-productive! I digress...

I ended up cutting between 3 and 4 inches of Syd's hair, just to be sure we removed all the damage.
The shadows in this picture make the ends look really uneven, but by the time I realized it, her hair was no longer straight, so I couldn't take a better pic. :/


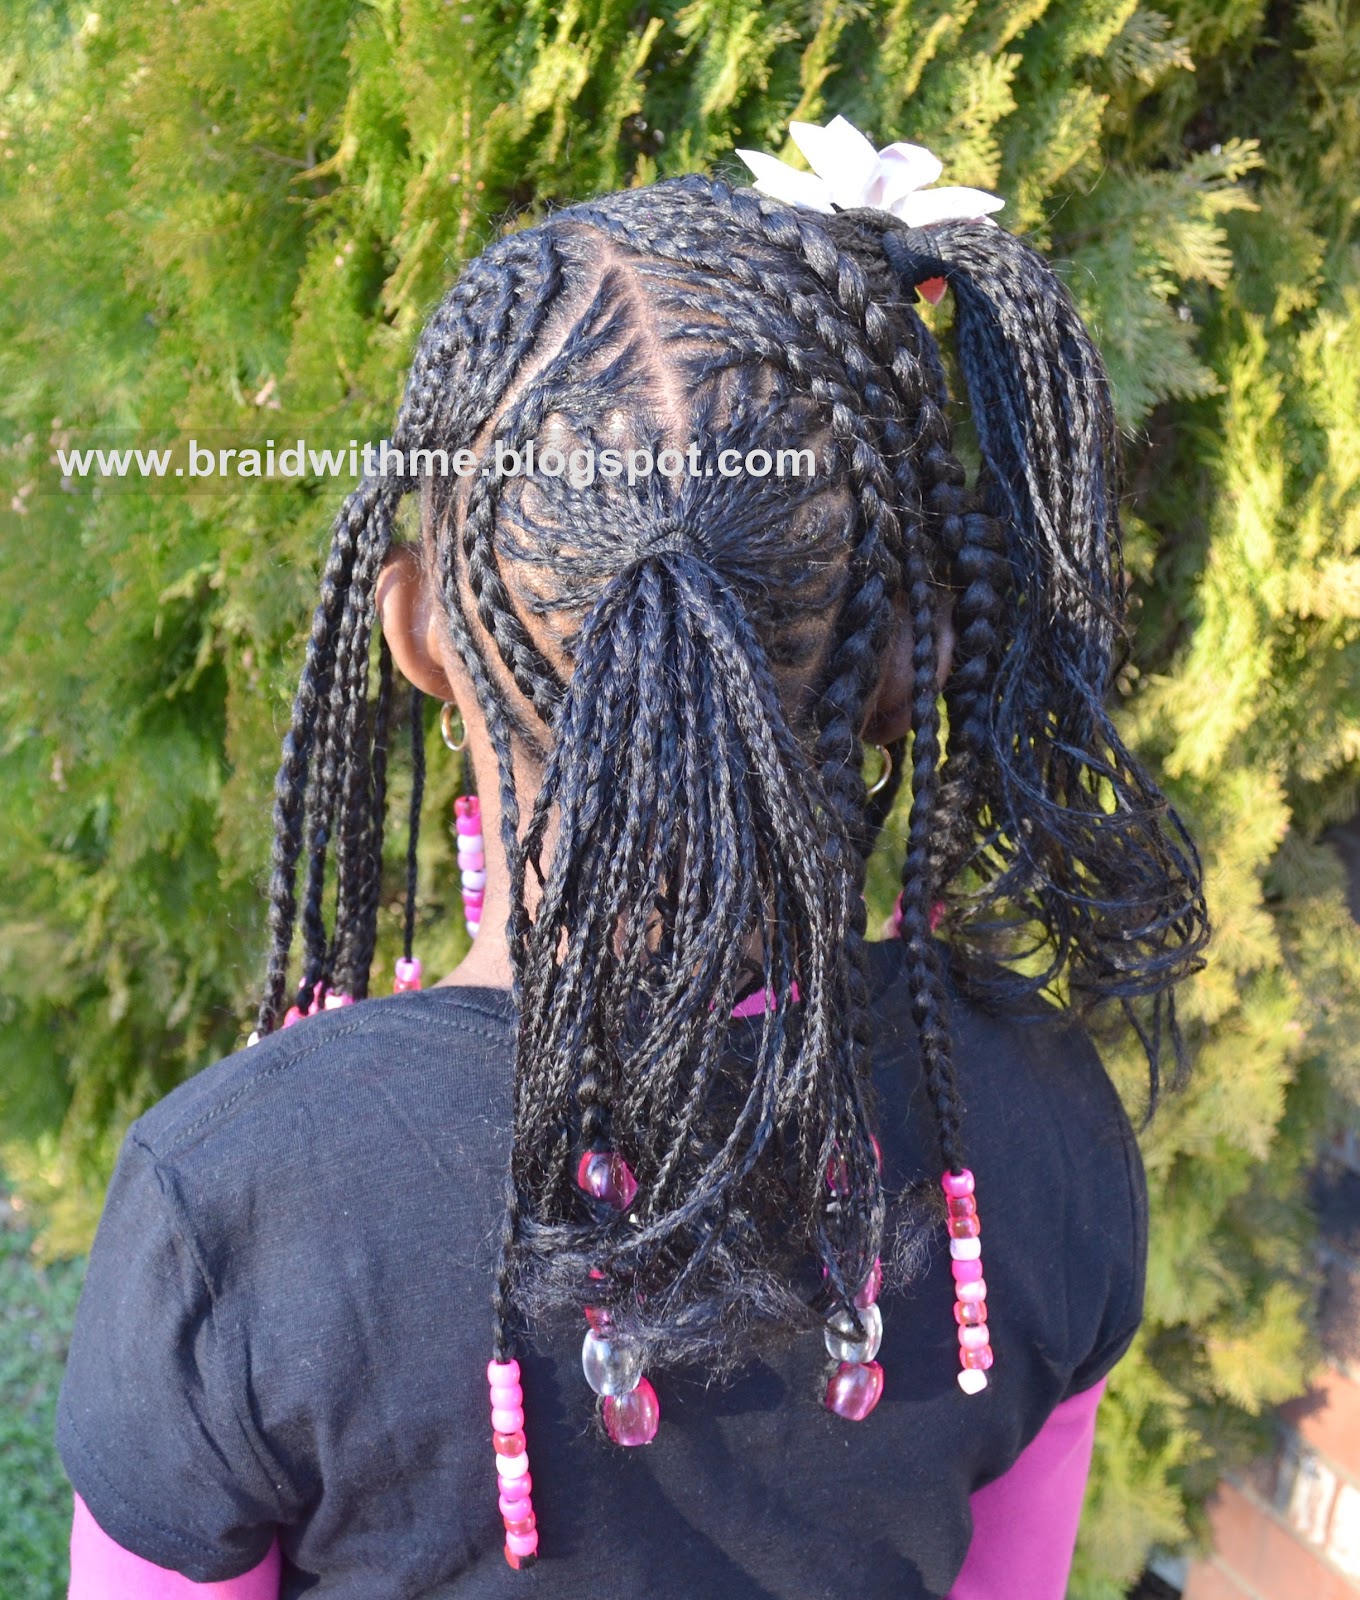
Day 3 of straight hair was Easter. Since her hair was still looking good, I decided not to do much styling. I just made 2 french braids around her hairline and brought them around to meet in the back. 4 minutes and we were done!


After 4 days of straight hair, Syd spent an afternoon being very physically active, so she got sweaty and her straight roots began to get puffy. We knew it was time to move into another style. She liked having her hair straight...she was amazed at how easy it was to comb. But that being said, she still truly loves big hair, so straightening will remain something that only happens on rare occasions. You just can't argue with her "bigger is better" hair theory!


Also - have you heard about our upcoming trip? After spending 9 days doing missions work in Guatemala last year, Syd and I are going back for an 8 day missions trip this August. You can read all about that on our MISSIONS TRIP POST and see more pics of last year's trip HERE. In addition to accepting donations, I am also using 100% of the proceeds from my etsy shop, HUFFLEBLOSSOMS, to pay for this trip. I would love for you to check out my shop, where you will find duct tape flower hair clips, fabric flower clips, and ladder ribbon jewelry. More items are added all the time, and I'm always willing to make custom pieces for anyone looking for specific colors, sizes, etc. You can contact me at huffleblossoms@gmail.com. Thanks to anyone who is able to help support us!

Sunday, April 15, 2012

Little Girls Hairstyle: Side Swept Two Strand Twists into Puff


Click photos to enlarge
I have a feeling you will be seeing a lot of Miss A's older cousin so let's go ahead and give her an alias. We'll call her Ky. Ky spent the night again this weekend and asked me if I could do her hair like her little cousins so of course I said yes.

I washed her hair with Cara B Naturally products (shampoo and conditioner). After washing I applied a generous amount of Bee Mine Luscious Moisturizer and banded her hair for the night (see picture below).


Banded hair
Stretched hair after banding

Ky's hair was ready for styling the next morning so I parted a square in the top middle section of her head. I cornrowed medium sections straight down and ended them in basic two strand twists.  I used Bee Mine Curly Butter for styling. I pulled her hair into a side puff with an ouchless ponytail holder and pinned her twists to the side near the puff. I added a headband and she was all done! She absolutely loves it. See more pictures below.


Here's Miss A's version in case you missed it. Check out the post here.

Miss A's version of this style.

Don't forget to "like" us on Facebook! www.facebook.com/beadsbraidsandbeyond


Friday, March 30, 2012

Two Strand Twists with Braided Roots Pulled into a High Bun


How perfect is this style for girls? We both absolutely love the way this turned out. A Facebook reader (Hi Lizanne!) completely inspired me to try this when she posted a picture of her daughters two strand twists with the roots braided. I've seen this done with synthetic hair but never thought to do it on natural hair. If you have problems with your roots being too puffy or frizzy or coming undone, then this right here should solve your problem! 

First, I washed my daughter's hair. After washing I moisturized on wet hair (Bee Mine Luscious Moisturizer) and applied a little extra virgin coconut oil over the moisturizer. I began by parting at a slant at the nape of her neck. I used Bee Mine Curly Butte for a little bit of hold. I braided about an inch of each section then took the 3 sections and made them 2 sections, finishing off with a basic two strand twist. To get her twists to stay in place, I roll the ends between my index and thumb several times. I continued making medium sections parted at a slant until I was finished. This style took about an hour or so to complete. I decided to place the twists up in a high bun. A few people were asking me how I got her bun so perfect on Facebook so read below for some quick instructions.

Click to enlarge
  1. Place twists in a high ponytail
  2. Gather all of the twists together and begin twisting them all one way.
  3. Begin rolling the twisted section around the ponytail holder.
  4. Tuck the ends under the bun and secure with an ouchless ponytail holder. Use bobby pins if you need extra hold.
  5. All done!
If the hair is not long enough for this bun method, try using a sock or donut piece then wrap the twists around and tuck the ends under. Click here for instructions.

For bonus pictures, "LIKE" us on Facebook! :-) www.facebook.com/beadsbraidsandbeyond


Friday, March 23, 2012

Natural Hair Updo - Cornrows & Cinnabuns

My daughter has been asking for a mohawk for months so I decided to pull some inspiration from our Facebook page and give her a cute, girly mohawk updo. She absolutely loves it! I think it's an adorable style for little girls, especially with cute Spring dresses. Jazz it up with a bow or hair pins and you're good to go!

The style is actually very simple so I'll try to keep the instructions short.

Miss A's hair was previously moisturized and banded so her hair was already stretched out quite a bit. If you're not into banding, you can completely skip this step. If you don't know what banding is, please check out our Banding F.A.Q. post.

I began by parting the hair from ear to ear. I tied off the back so I could easily work with the top section. Using a metal rat tail comb, I made a slanted square. I tied off the middle section so I could cornrow the left and right sections. If you do not know how to cornrow, please check out our Cornrowing for Beginners post. Flat twists would look just as adorable. I didn't want too much going on with this style so I kept the cornrows pretty basic. Just going straight up the sides.

After cornrowing both sides, I untied the top middle section and parted medium sections of hair with my fingers. I grabbed a black ouchless band and loosely tied off about 8 sections. I two strand twisted each section and left them overnight. I untied the back of her hair and did the same thing. I knew she didn't need cornrows in the back because her hair is so thick so the little cinnabuns would have covered them. 

The next morning  I removed the two strand twists, leaving the ouchless ponytail holders in. I gathered each section and wrapped it around each ponytail holder. I used a bobby pin to secure each little bun. I tried to make the buns kind of loose. I wanted a really full updo.

As for products, I used Bee Mine Luscious Moisturizer to moisturize and Bee Mine Curly Butter to style. We still have a reader discount code, good through the end of March. The code is BBBJAN for 10% www.beemineproducts.com

Don't forget to "Like" us on Facebook! You will find a lot more updates and pictures there.


Friday, February 17, 2012

Cornrows, Hearts & Huffleblossoms

By Aisha of Braid with Me
Happy Valentine's Day!!

It's Valentine's Day once again so you know what that means!! Hearts!! I wanted to do something a little different this year for Anisa heart style. I created a combination of cornrows, mini box braids, and ponytails with curls and beads. 

Check out this heart! 


Huffleblossoms

We had the honor of receiving this beautiful Huffleblossoms flower clip to review. Let me start by saying that I absolutely love this flower clip! It perfectly matches so many things that Anisa has in her closet being that her favorite color is pink! 


Each Huffleblossoms flower is handmade with love and care. This particular flower is made from duct tape! How cool is that?! It is approximately 3.5 inches wide and is secured with a comfortable alligator clip. For more information about these fabulous flowers, head on over to Huffleblossoms on Etsy. 

The Style 


From Head to Toe!


Need More Convincing?

If by chance you need a bit more convincing about the awesomeness that is Huffleblossoms, check out the following reviews:


Also be sure to check out the Huffleblossoms Facebook page! 

I could not end without adding one more very important link. The creative hands in charge of Huffleblossoms is also the mastermind behind Tweeny Hair! That's right, Rae of Tweeny Hair is a force to be reckoned with! She truly does do it all! 

Don't forget to "Like" our Facebook page.