Showing posts with label african american hair styles. Show all posts

Wednesday, July 11, 2012

Natural Flower Girl Updo with Cornrows and Twists


Another updo! I know you're probably sick of them at this point but we have been loving them! Miss A thinks she's Princess Tiana! (hmm, possible Halloween costume?) I know how hard it is to find natural flower girl hair styles or special occasion hairstyles done on curly hair so I'm going to try my best to showcase styles fit for the occasion. 

Let's begin with instructions, shall we?

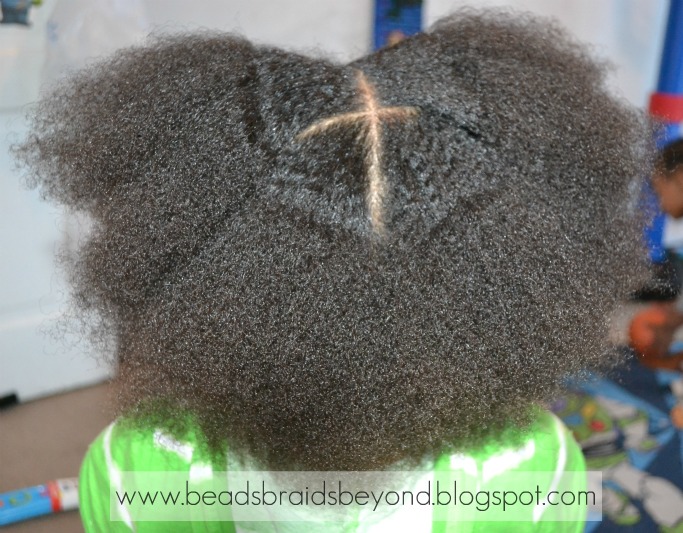
Miss A's hair was already moisturized and stretched from her previous bantu knot-out. I parted a half moon shape on the top middle section of her hair and tied it off. I started by parting a curved section near her left ear for the first cornrow. I added a little Bee Mine Curly Butter to the section and braided. If you don't know how to cornrow you can do a simple two strand flat twist or check out our Cornrowing for Beginners post. I used a rubberband to secure the cornrow once I got to the end and left the remaining hair out. I only wrapped the rubberband about 3 times, just enough to secure the cornrow but not tight enough to cause breakage.

I continued beginning my parts at the nape of her neck, slightly curving each part and cornrowing until I reached the other side.

I banded all of the loose hair into three separate banded sections and had her sleep with a sleeping cap overnight. Not sure what banding is? No problem, check out our Banding F.A.Q. post.

The next morning I removed the banded and created three large two strand twists with the top section of loose hair. I played with the twists for a few minutes to see how I wanted the updo to look. I wrapped the left twist around to the right side and secured with a bobby pin then I wrapped the right twist to the left side and secured. I decided to do a twisted cinnabun with the last twist. As you can see I made it sit on her forehead a bit. A little bit of an old school feel.

To bring the entire flower girl look together I had her put on an old dress and placed a single flower clip bought from Claire's on the side of her updo. See below for more pictures!

Don't forget to "like" us on Facebook!

Feel free to share this post on Facebook, Twitter or Pinterest!


Saturday, July 7, 2012

Natural Hair Updo: Twisted Cinnabuns with Cornrows


We have been loving updo's over here lately! Can you tell?  Miss A will be attending her Aunt's work event this weekend so I decided to give her a style to fit the occasion. This style is perfect for both little and big girls. Great for holidays, formal events or just to feel like a princess! 

As always, I washed, detangled, moisturized (with Bee Mine Luscious Moisturizer) and banded Miss A's hair. For full washing instructions click here.

I removed the bands once her hair was almost dry, just slightly damp. I began by parting the hair from ear to ear and tying the top section off. I started working on the back section at the nape of the neck, cornrowing from the right into the middle and from the left into the middle until I was done with the back. I used Bee Mine Curly Butter on each cornrow. 

Once I got to the top I parted a fairly large section in the middle and tied it off. I added a few cornrows to the side sections going up into the middle of her head. Once those cornrows were complete I gathered a large section of hair in the front, tied it off with a ponytail holder and did a loose two strand twist. Once the twist was in I began to create the cinnabun. I simply wrapped the twist around the ponytail holder, making sure it laid flat the entire time. Once the twist was wrapped around into a cinnabun, I placed 1 or 2 bobbypins flat, straight through the cinnabun. I continued this process until she had 5 twisted cinnabuns. I added some cute flower clips I bought from Claire's and there you have it, a beautiful natural updo!

Don't forget to "like" us on Facebook!


Criss-Cross Cornrows with Two Strand Twist Out


Hey everyone! I hope you all had a nice 4th of July. I decided to keep Miss A's 4th of July hair style fairly simple and go with criss-cross cornrows going half way back into two strand twists. Read below for more info on how this style was achieved. 

First, I washed, detangled, moisturized (with Bee Mine Luscious Moisturizer and Virgin Coconut Oil on top) then banded. You can read all about how I do that and what products I use by clicking here.

After Miss A's hair dried I removed all of the bands and parted her hair from ear to ear. I tied the back section off and began working on the top section. At an angle, I parted two straight sections and in those straight sections I parted 3 individual sections to begin the criss-cross cornrow. You can see how I criss-cross cornrow by clicking here. I used Bee Mine Curly Butter on each cornrow. 

I left the remaining hair loose at the end of each cornrow until I had 2 cornrows side-by-side then I applied a generous amount of Bee Mine Curly Butter to the remaining hair and twisted the two sections together.

After the top section was complete I moved on to the back. I parted large squares, applied some curly butter and twisted each section together. I rolled the ends of each twist between my fingers to make sure the twist did not unravel.

After a couple of hours of letting the two strand twists set I carefully unraveled each twist, starting from the end of the twist and working my way up and viola- A beautifully defined twist out! See pictures below.

Don't forget to "LIKE" us on Facebook!


Friday, July 6, 2012

Beautiful Nubian Princess Braids


By: Aisha of Braid With Me

Beautiful!! This is the word that comes to mind when I look at my baby girl with this style! The design + the wooden beads + the Anisa in her natural beauty = Beautiful Nubian Princess Braids! 


To achieve this style, I removed Anisa's previous Box Braids that can be seen here and here. Next, I finger detangled her hair using coconut oil in preparation for a cowash. I continued by using our routine and by banding her hair overnight. 


I began by parting her hair from side to side directly behind each ear. The back portion of her hair was secured with an ouchless band while I braided the front. The front section was styled with free-form braids and adorned with wooden beads. 


I left the back section down for a little while before I placed it into a huge puff. 


For bedtime, I finger detangled the back section with coconut oil and made several large, two-strand twists. I rolled the ends of the twists with satin covered sponged rollers and protected her hair with a satin bonnet. 

The next day, I removed the rollers and twists and was a bit surprised to see that the back of her hair was basically flat. We had a fun day planned so it was okay. 


As you can see, Anisa was VERY active at the festival that we attended. 


 Before bedtime on day 2, I decided to add flat twists to the back instead of regular two-strand twists. I also used flexi-rods instead of the satin covered sponge rollers. 


Similar Styles
Braid with Me - New Protective Style


If you enjoyed this post, let us know by leaving a comment below! As always, be sure to "Like" our Facebook page to see more updates for this style! 


Sunday, June 3, 2012

Flat Twists into Afro


You may remember Miss A's older cousin, Ky, from a few past posts- here, here and here.

Ky came over with her hair in a few large twists so I decided to give her a quick style before we headed out.

I started by spraying her hair with water and adding a fairly generous amount of Bee Mine Luscious Moisturizer all over her hair. I detangled with a Denman brush, this only took a few minutes because her hair wasn't very tangled. I then parted the top section of her hair from ear to ear and tied off the back. I parted the top section straight down the middle and got started on the left side of her hair. Using a metal rat tail comb, I parted near her left ear at an angle and began doing a basic two strand flat twist. Simply part a small amount of hair at the beginning of the section you are twisting, split it into two and cross the right piece over the left piece, pinch off a small amount of hair evenly across and add it to your new left section. Continue pinching off a little hair, adding it to each section and cross over until you get to the end of the flat twist. Keep a good grip on the end of the flat twist so it does not come undone. I decided to secure the end with a rubberband dipped in extra virgin coconut oil. I continued this process until she had a total of 6 flat twists on top.  I fluffed the back of her 'fro and viola! All done!

This was Ky's first time wearing her afro out. She really liked the style but was worried about what others would think. I told her that her hair is absolutely beautiful just the way it is and she should never be ashamed of it! :-) She got so many compliments on her style and at the end of the day she told me she really likes afros now. I cannot express the joy I felt when I heard that, it totally made my week.

If you are interested in trying Bee Mine Products, don't forget we have a reader discount code especially for you! Get 10% off your purchase using code: SPRINGBBB www.beemineproducts.com Happy Shopping!

Don't forget to "like" us on Facebook! :-)


Saturday, May 26, 2012

Flat Twists into Side Ponytail

click to enlarge

Just a quick 'do. Two strand flat twists going into side ponytail.

School is out in about a week so expect many more updates to come. :-)

Thursday, May 17, 2012

Box Braids for Girls + iheartcurls Review

By: Aisha of Braid With Me


The Style

Anisa has been sporting a new protective style lately... Box Braids!!! Box braids are one of my favorite protective styles because they are so versatile. You can wear them up or down, curly or straight. You can also style them or just let them be.  With the proper care and moisture, box braids can last for a very long time! 


I curled Anisa's box braids using Curlformers after a couple of days of having them in. Although her hair didn't curl the way that I hoped it would, I was still very pleased with the results. 


iheartcurls

I recently received these beautiful headbands and the gorgeous flower from Twisted Marie of iheartcurls. Iheartcurls offers fold over elastic headbands and hair ties that are both durable and affordable! The following description is available on her Etsy page:

This listing is for two FOE headbands with a silk flower and interchangeable snaps. These two bands are interchangeable the Velcro snap makes it easy to wear the flower on either band or wear it without the velcro snap. They are comfortable and can stretch easily while still maintaining their shape. Stretchy, soft material will not leave any dents or cause any headaches. Can be used to pull back hair without snagging or pulling too tight. Can be hand washed and laid flat to air dry. The ends are heat sealed to prevent fraying.


I received the Petals Package:

 Detachable flower with velcro attachment
 Fold over elastic headband with removable velcro attachment


The Review

Twisted Marie has created a wonderful product that does exactly what it claims. Anisa never complained about the headband being too tight. Nor did she have a problem with it slipping out of place. The orchid is absolutely beautiful! It never fell off and the velcro attachments did not pull or snag on her hair. 


I would definitely recommend these products!! They are durable, affordable, and oh so cute!! If you want to learn more about iheartcurls, head on over to her Etsy shop and let her know that I sent you!! 


Sunday, April 15, 2012

Little Girls Hairstyle: Side Swept Two Strand Twists into Puff


Click photos to enlarge
I have a feeling you will be seeing a lot of Miss A's older cousin so let's go ahead and give her an alias. We'll call her Ky. Ky spent the night again this weekend and asked me if I could do her hair like her little cousins so of course I said yes.

I washed her hair with Cara B Naturally products (shampoo and conditioner). After washing I applied a generous amount of Bee Mine Luscious Moisturizer and banded her hair for the night (see picture below).


Banded hair
Stretched hair after banding

Ky's hair was ready for styling the next morning so I parted a square in the top middle section of her head. I cornrowed medium sections straight down and ended them in basic two strand twists.  I used Bee Mine Curly Butter for styling. I pulled her hair into a side puff with an ouchless ponytail holder and pinned her twists to the side near the puff. I added a headband and she was all done! She absolutely loves it. See more pictures below.


Here's Miss A's version in case you missed it. Check out the post here.

Miss A's version of this style.

Don't forget to "like" us on Facebook! www.facebook.com/beadsbraidsandbeyond