Showing posts with label puff. Show all posts

Sunday, April 15, 2012

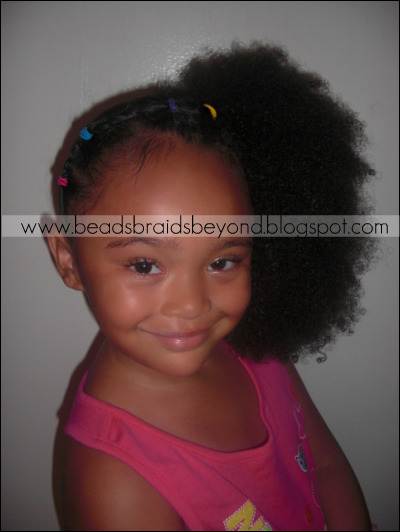
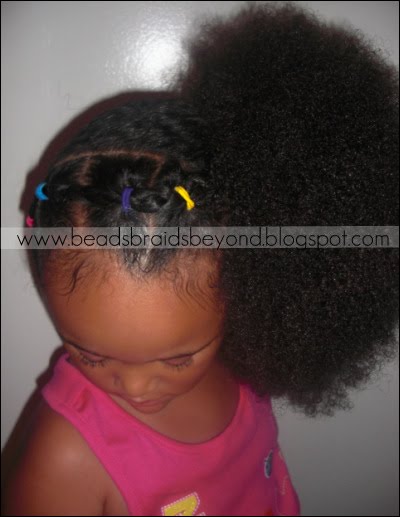
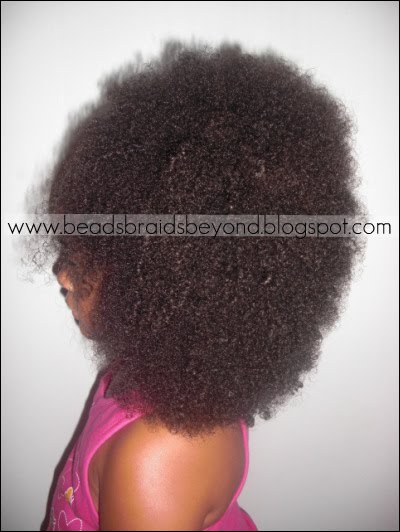
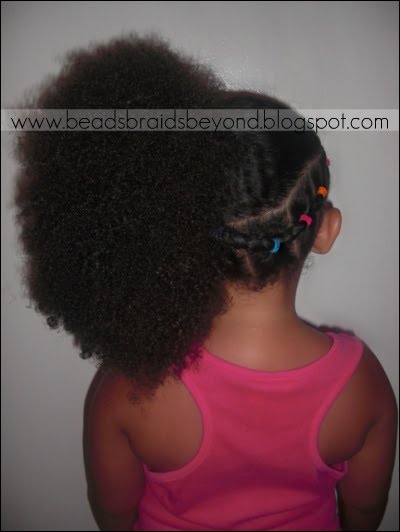
Little Girls Hairstyle: Side Swept Two Strand Twists into Puff


Click photos to enlarge
I have a feeling you will be seeing a lot of Miss A's older cousin so let's go ahead and give her an alias. We'll call her Ky. Ky spent the night again this weekend and asked me if I could do her hair like her little cousins so of course I said yes.

I washed her hair with Cara B Naturally products (shampoo and conditioner). After washing I applied a generous amount of Bee Mine Luscious Moisturizer and banded her hair for the night (see picture below).


Banded hair
Stretched hair after banding

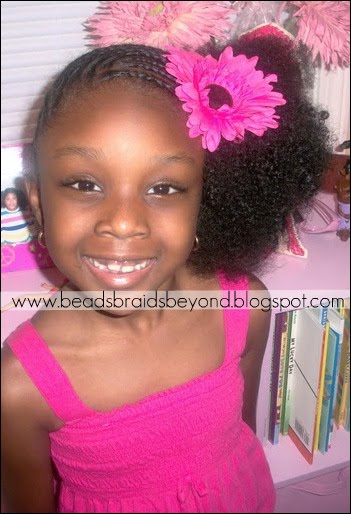
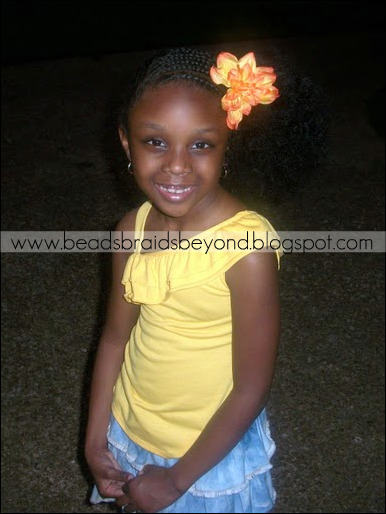
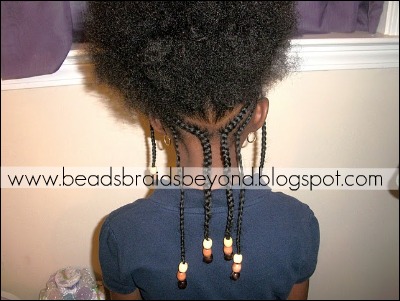
Ky's hair was ready for styling the next morning so I parted a square in the top middle section of her head. I cornrowed medium sections straight down and ended them in basic two strand twists.  I used Bee Mine Curly Butter for styling. I pulled her hair into a side puff with an ouchless ponytail holder and pinned her twists to the side near the puff. I added a headband and she was all done! She absolutely loves it. See more pictures below.


Here's Miss A's version in case you missed it. Check out the post here.

Miss A's version of this style.

Don't forget to "like" us on Facebook! www.facebook.com/beadsbraidsandbeyond


Wednesday, April 4, 2012

Little Girls Natural Hairstyles: Twist Out's + Puff with Twisted Bang

Miss A and her cousins. Click pictures to enlarge
Natural hair, it's a beautiful thing on little girls, no? No matter what texture or length.

I told you all on our Facebook page I was going to post more pictures and details of Miss A and her cousins hair so let's get started.

Let's discuss Miss A's older cousins hair first. You saw her Side Cornrows with Two Strand Twists style posted a few days ago and I mentioned we planned on doing a twist out. The day after I styled her hair she came back over so I could remove the twists. I didn't really do anything special other than take the two strand twists out. When doing a twist out, I slowly unravel from the ends and work my way up. As you can see, her twist out turned out fabulous! Very well defined. She really loved it and could not stop admiring herself in the mirror. This was her first ever twist out. 


Moving on to Lil Bit. I posted her Cornrows and Twisted Bangs style the other day as well. For pictures, we decided put her hair up in a high ponytail and gently brush the hair out for a nice round puff. I pulled the twisted bangs to the side and added a bow. How adorable does she look? 


And last, but certainly not least, Miss A! You saw her Two Strand Twists with Braided Roots + High Bun hair style posted about a week ago. She has another EEG this week so I had to go ahead and take the twists down. Her twist out came out beautiful. I like the idea of leaving the braids in at the roots because her roots are the first to puff up when she wears twist outs and braid outs. Another happy girl!


I should have a post up next week on how YOU can get the perfect twist out on any hair type so be on the look out for that.

Don't forget to stop by and "LIKE" us on Facebook! https://www.facebook.com/beadsbraidsandbeyond

Saturday, November 27, 2010

Cornrows and A Big Puff

Photobucket


Photobucket

Photobucket

Instructions:
  • Always start with clean, detangled, moisturized hair. I started by parting Anisa's hair down the middle from front to back. Gather one side into a ponytail in order to work on the other side. I began by making a braid in the center of her head. I braid stopped in the center of her head. It is not necessary to braid the hair to the end because it will be gathered into the big puff.
  • Next I made a cornrow on one side of the center cornrow. This cornrow goes all the way down to her ear. You will repeat this step on the other side. Next, I made another cornrow behind the cornrow I just made. This cornrow will go all the way to the back of her head. You will repeat this step on the other side as well.
  • The final cornrow was made near the back of her ear, underneath the last cornrow that was made. This cornrow will go all the way to the back as well.
  • I gathered the remaining hair into two separate puffs. My final step was to gather the two puffs together with an ouchless band in order to make one big puff on top. Finish the look by adding your beads of choice.

Photobucket

Photobucket

Tuesday, August 17, 2010

Braids To The Side With A Puff

Photobucket

Photobucket


Braids Tutorial:

Start with clean detangled hair. I washed/conditioned Anisa’s hair the previous day using HEHH. I banded her hair for bedtime. I used Bee Mine Luscious Balanced Cream Moisturizer, Bee Hold Curly Butter, and Deja’s Hair Milk for this style.

Photobucket

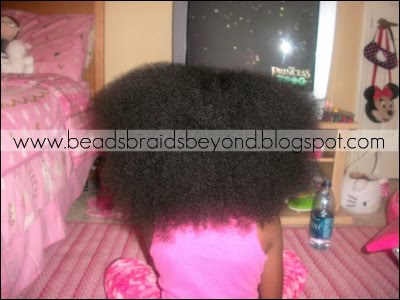
  1. When I began this style, Anisa’s hair was still a little damp and not as stretched as I normally prefer. That was okay because I wanted a big puff. I began braiding her hair in the back and secured the rest of her hair with an ouchless band. You will begin your braid on one side and continue the braid to the opposite side. For instance, if you start you braid on the right side, you will continue the braid all the way to the left side. You do not have to complete the braid because the end result is a big puff.
  2. Photobucket Photobucket Photobucket
  3. Continue braiding from one side to the other in your own preferred style. I used plastic clips to keep the extra hair from the braids out of the way.
  4. Photobucket
  5. Continue braiding the hair, adding the luscious balanced cream moisturizer and curly hold butter as you go. I should add that I did not use the hair milk on her braids. I only used it on her puff.
  6. Photobucket Photobucket Photobucket Photobucket
  7. I ended up with 18 cornrows/braids in all. I divided Anisa’s cornrows/braids into 3 sections (6 braids each) and secured each section with an ouchless band. I used purple ouchless bands to match her outfit. Having 3 separate sections will result in a larger puff.
  8. Photobucket Photobucket
  9. Once she had her outfit on, I added 2 purple curly clips. One clip was placed on top of the middle section, and the other clip was placed on top of the front section. I applied a little bit of the Deja’s Hair Milk to her puffs, fluffed, and I was done!! (Anisa’s top is from Old Navy. It was on sale ($8) when I bought it but its regular price now - $10.50. It matches the purple and white Jordan’s perfectly!)
  10. Maintaining this style: I will moisturize Anisa’s hair as needed, especially at night, with the Bee Mine products. I will use a spray bottle with water to wet her puff so I can detangle it if needed. I will apply the Luscious Balanced Cream Moisturizer or Deja’s Hair Milk and create a 2-strand twist for each of the 3 sections. I will use Bee Mine Juicy Moisturizing Daily Spritz on her braids. She will sleep with a satin bonnet. In the morning, I will unravel the twists and fluff. I will moisturize as needed. This style could last for about a week with proper care.

Total Styling Time: 1 hour

Products Used:
  • Bee Mine Luscious Balanced Cream Moisturizer
  • Bee Mine Bee Hold Curly Butter
  • Bee Mine Deja’s Hair Milk
  • Bee Mine Juicy Moisturizing Daily Spritz
  • Ouchless bands
  • A comb for parting
  • Wide-tooth comb
  • Plastic clips (for separating the braids from the rest of the hair)
  • Curly clips

Photobucket

Photobucket

Photobucket

Photobucket
With flower clip from Charlotte Russe

Photobucket
Picture from first time I did this style. The flower clip is from Target.

Monday, July 12, 2010

Connected Rainbow Ponies into Side Puff

Photobucket

Photobucket


Instructions:
  • Start with wet/damp, detangled, well moisturized hair.
  • Begin parting a medium/large square by the right ear. Use a rubberband/elastic and tie that square off. I used Mini No Damage Elastics, use colorful elastics for the cute rainbow look. Braid the hair in that rubberband/elastic down about an inch or so.
  • Part your next square right above your first square, connect your first ponytail/half braid in to your new square.
  • Part your third square right above your second square. Connect your second ponytail/half braid in to your new square. Continue this process until you get about 1-2 inches from the left ear. I only did 4 connected square ponytails on top.
  • Now start behind your right ear. Part a square, tie it off with your rubberband/elastic, braid it about an inch or so down.
  • Part a square/section right under your first square, connect your first ponytail/half braid in to your new square/section.
  • Continue this process until you have reached about an inch or two near the left ear. I had a total of 4 sections in the back as well.
  • Tie the puff off with an large ouchless/no damage ponytail holder, moisturize and fluff.

Total Styling Time: 15-20 Minutes
Products Used:
  • Rat tail comb and wide tooth comb
  • Bee Mine Luscious Moisturizer
  • Colorful No Damage Mini Elastics by Scunci Girl (review soon)
  • Thick No Damage Elastic by Scunci Girl

Photobucket


Photobucket


Photobucket

Saturday, June 12, 2010

One Big Natural Puff

Photobucket

I took out A's Criss Cross Cornrow Layers at the end of day 10. I decided to let her wear her hair out and in a puff for a few days before we restyled. If there's one thing I love, it's a big puff! If you have a child with long/thick hair, then you know sometimes it can be difficult to get it all smoothed down and in the ponytail holder. This time I tried something a little different. Instead of doing one puff, I did three ponytails, then placed another ponytail holder over the three and viola!

Photobucket


Get the look:
  • After taking A's criss cross cornrows out, I added Bee Mine Bee Loved Hair & Scalp Moisturizer to A's hair and finger detangled.
  • After finger detangling her hair, in small sections I added a little more Bee Mine Bee Loved Hair & Scalp Moisturizer to detangle her hair with a wide tooth comb. This provided her hair enough moisture, and me enough slip, to prevent breakage. Now, I don't think dry detangling is for everyone. This definitely takes time and I follow a certain technique. You have to be patient, take it slow, and be very gentle, otherwise you will cause breakage. When I detangle on "dry" hair I add a very moisturizing product, her hair must be stretched out, and I must finger detangle her hair well first, then I move on to a wide tooth comb.
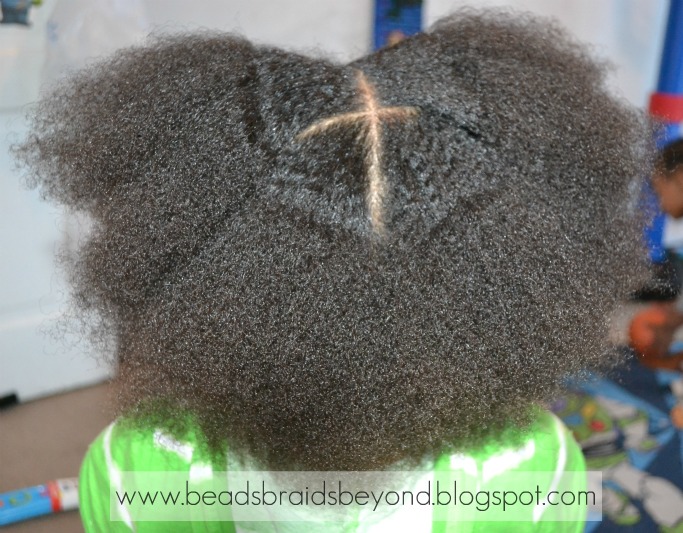
  • After fully detangling her hair, I parted from ear to ear, made a side part in the front, then added two ponytails in the front and one in the back. I used Bee Mine Curly Butter to smooth the hair into each ponytail. I used cloth covered ponytail holders and only wrapped them around each ponytail twice. I took another cloth covered ponytail holder and placed it over all three ponytails and there you have it-- One Big Natural Puff!

Photobucket

I also find that using a large Goody ouchless band, then wrapping it twice, and using it as a ponytail holder works very well!

Tune in Monday for a short video interview with A!

Tuesday, May 18, 2010

Slanted Cornrows into a Puff

Repost from 2009

Photobucket


Instructions:
  • Start with completely detangled, damp, well moisturized hair.
  • If you do not know how to cornrow, please click *here* for my cornrowing instructions.
  • Starting on the right side of the head, near the right ear part out your first cornrow, you will curve this cornrow going "in" toward the right ear. This cornrow should be about the width of your middle finger. Make sure you add your choice of styling product to each section that you cornrow to help with the hold.
  • Continue parting on the right side of the head about half way back with a slight curve.
  • Once you get to the top of the head, switch from your right side to your left side.
  • You will basically be doing the same thing on your left side. Part out your first section of hair on the left side near the ear with a curve, going "in" towards the left ear. Continue until you "run in to" your right side.
  • You will now have hair left out in the middle of the head. It will look similar to the shape of a triangle. You want to part off sections of hair going towards the right side. I cornrowed 4 sections of hair in that triangle area.
  • After cornrowing her hair, I put the back in a puff and she was all done!

Maintaining this style:
  • Remove ponytail holder each night and moisturize the hair/puff. You can use a spray moisturizer on the cornrows or you can simply rub a little leave-in/moisturizer over the cornrows.
  • Try to have your child sleep with a satin bonnet or satin pillowcase each night.
  • In the morning, remove satin bonnet, put hair back into a puff, moisturize and fluff.
  • For less tangles, finger comb the hair each night. For even less tangles, after finger combing twist/braid the hair in about 3-4 big twists/braids and remove in the morning.

Saturday, April 17, 2010

One Big Puff

Repost

Photobucket

Sometimes, elaborate styles are the least of our worries. Maybe you have to run errands, or make you want to take a break from styling. Going back to the basics is the way to go. I love puffs! One puff, two puffs, you can never go wrong. Detangle, moisturize, & add a cute bow. Your little cutie is good to go! If you want to jazz it up a bit you can add a few two strand twists in the front, add a few ballies around the twists, then put the puff in the back. You can do cornrows on the top then put the puff. The possibilities are endless.