
.jpg)
.JPG)

.jpg)
.jpg)


.jpg)
.jpg)
.jpg)
.jpg)
.jpg)
.jpg)


Instructions:
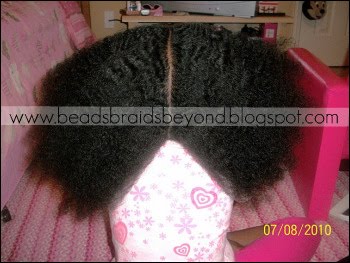
- Start with clean detangled hair. I cowashed Anisa’s hair with Herbal Essence Hello Hydration conditioner the day before doing this style. I applied Bee Mine Luscious Moisturizer after rinsing and detangling her hair. I put her hair into several large plaits to let it dry. Before starting her hair, I removed the plaits and banded her hair for about an hour to stretch it some more.
- I removed the bands and parted her hair into two sections.
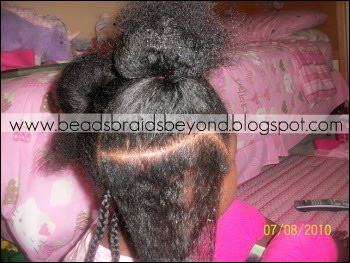
- I secured one side with a Goody’s Ouchless band and made my first part on the opposite side. The part was made at the nape. I secured the rest of her hair with another ouchless band and began braiding. The braids should go towards the part that is in the middle. I used Bee Mine Luscious Moisturizer while braiding her hair.
- Continue to make parts in any design that you choose and braid.
- I continued to make parts and braid her hair. I went ahead and released the hair on that side and made a part at the top for one of her ponytails. You can do this before you start braiding if you wish. I secured the hair for the ponytail with another ouchless band and continued to braid her hair.
- I finished braiding her hair on that side and I went ahead and made one of the ponytails just to show you how it will look. You do not have to make your ponytails at this point.
- Now you can begin braiding the other side. Begin by once again parting the hair at the nape. I like for the braids on both sides to line up but that is up to you. If you cannot get the braids to line up exactly, don’t worry about it! It will be covered by the ponytails.
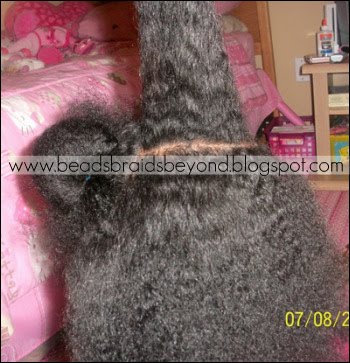
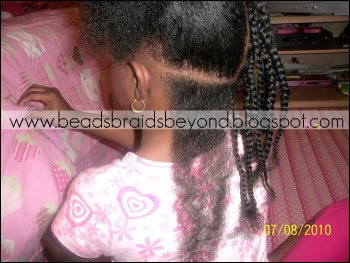
- I continued to make my parts and braid her hair. You will continue to do this until you are done braiding that side. I chose to braid Anisa’s hair almost all the way down. You do not have to do this. I did it to stretch her hair out some more. You can make your second ponytail in the front at this point.
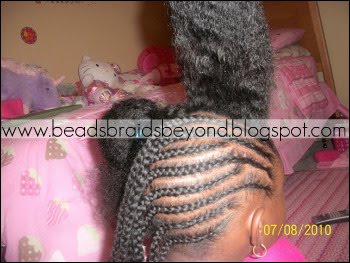
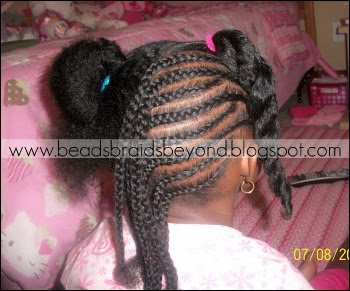
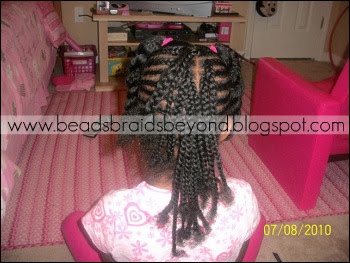
- I began to section her braids to make the ponyhawk. The first time I did this style, I used rubberbands. This time I chose to use ouchless bands instead. Nikki likes to soak her rubberbands in olive oil prior to using them on A’s hair. So if you are using rubberbands, you may want to do this. I made a total of 16 cornrows – 8 on each side. I gathered 4 braids (2 braids from each side) in order to make one ponytail. I ended up with 4 ponytails in all.
- My next step was to unravel her braids in order to make the ponytails. I made 2 two-strand twists in each section so she ended up with 8 two-strand twists in all. I applied Bee Mine Bee Hold Curly Butter to her hair prior to making each ponytail.
- I secured her front ponytails with black ouchless bands and the ponyhawk ponytails were secured with dark pink and light pink bands. I finished off with pink barrettes and a pink bow twisty on each of the front ponytails. The twisties were on top of the black ouchless bands.


Total time: 1 – 1.5 hours (Keep in mind that I am stopping to take pictures while I am braiding so it probably won’t take you as long).
Products used:
- Bee Mine Luscious Moisturizer
- Bee Mine Bee Hold Curly Butter
- Goody’s Ouchless bands
- Plastic clips (used to separate the hair while braiding)
- Comb for parting
- Wide tooth comb


Stop by tomorrow to see how Aisha maintains Anisa's PonyHawk style and to see some updated pictures!
.jpg)
I love this style it is sooo cute, your daughter has a beatiful head of hair, Great Job Mom can't wait to see more tut
ReplyDeleteVery nice style. She can do a different style each day with this. One ponytail in the back, one french braid in the front going to the side and a french braid in back, one ponytail in front, or a bun in the back. The creator of this style gets 2 thumbs up! Gonna use this once my baby girl's hair is long enough
ReplyDeleteI loved this style the first time I saw it. I'm so excited for the tutorial. She is such a pretty little lady.
ReplyDeleteCute Hairstlye!!! I can't wait until Danaiya's hair is long enough to try this...but I have to learn how to braid 1st...
ReplyDeleteVery cute, good job.
ReplyDeleteAisha, I like this style. Can't wait until tomorrow to see how you maintain it. I notice that you say you do her hair every week. Do you shampoo or co-wash?
ReplyDeleteThanks for the clear tutorial, much appreciated. I have just completed a slightly messier version on my own daughters hair.
ReplyDeleteAngelicque
I love this style too! I will be trying this style on my daughter next week!
ReplyDeleteBeautiful hair! What do you use to smooth her ponytails and prevent frizzies? I love the style!
ReplyDeleteThanks Aisha for sharing step by step process. Your daughter's hair is beautiful!
ReplyDeleteCute style and gorgeous hair! I can't wait to have a little girl of my own and try these out on her natural hair :-D
ReplyDeleteLove this style! Did this on Trin's hair last week for our trip to New Orleans - loved the back but wasn't feeling the front. Now I see I needed to add a few more braids. Repeat in the works!
ReplyDeleteVery pretty. Great job.
ReplyDeleteThis comment has been removed by the author.
ReplyDeletei love love love this style.. great description and break down...
ReplyDeleteThanks everyone!! I really do appreciate it!
ReplyDelete@ Tata - Both. It really just depends on the previous style and what I'm going to do next.
@ My2gurlz - The products that I use for daily upkeep (other than the products listed) will be listed in the update tomorrow. Be sure to check it out!!
Thanks for the tutorial!! When I learn to cornrow, this will definitely be one of the styles that I try. On a side note, I love Anisa's room!!
ReplyDeleteThis is a great style aisha so intricate but you know everything other than one ponytail is intricate to me lol.
ReplyDeleteOkay I know I was supposed to be looking at her hair in the pics but I couldn't help but notice her room. She has a really cute bedroom. Sorry totally off topic. I love this style though. I did it on my daughter when I saw it posted in your hair share. Love it!!!!!!
ReplyDeleteThis is a very cute style. I finally have my Bee Mine products and they instantly worked great on Lady bugs hair *woot woot* lol
ReplyDeleteCan anybody tell me what plaits are? I originally thought they we're braids but I'm not sure if i'm mistaken or not.
Aisha: I've really been enjoying your style posts. Your daughter's hair is beautiful!
ReplyDeleteOk I will do a co-wash this week on my daughter's hair and see if I like it.
ReplyDeleteVery cute, her hair always looks so smooth and shiny...good job! Can't wait to try it on my girls' hair when its longer!
ReplyDeleteAisha this style is gorgeous. I really appreciate the tutorials as I am trying to get my daughter's hair in better shape yet keep her looking cute. I lack the creativity to come up with styles like these myself so the I really appreciate the help!!
ReplyDeleteI am beyond elated to have found this blog. I've already emailed a few parents of some of my students. This is MY hair!!! I've searched and searched for someone who had the exact hair texture, wave pattern, etc. as me as a child, and here she is! It's lovely. I love Aisha's hair, it's like looking at myself as a little girl. Soon my hair will be 100% healthy like yours again!
ReplyDeleteThis is another great style! I love that you can swith up the style and make a few different ones out of it. You're awesome with hair mama! Thanks for the ideas!
ReplyDeleteI did this style for church and though I tweaked just a bit it was beautiful. My daughter loved it and she got so many compliments. Keep this step by step tutorials coming.
ReplyDelete