Sunday, June 27, 2010

Where I Buy Our Flexi-rods


Some of you may know that I love flexi-rods. I have used them on my hair and my daughters hair. Click *here* to see some pictures. Many of you have asked me where I buy our flexi-rods for such a low price. I wish it was a world wide store, but unfortunately it's not. I buy our flexi-rods (they are called twist rods on the packs) from a family owned "$1 Store" (yes, that's the name on the sign). They come in a variety of sizes and they are all $2.50 per pack. I bought some large (1 1/4") flexi-rods today. There are three per pack. I also picked up two pink satin pillowcases for $1 each.

I have seen different brand flexi-rods being sold at ridiculously high prices. I guess they are ridiculous to me since I can get them for so cheap but I highly suggest you all check out your family owned dollar stores. If they don't have any, ask them if they would be able to order some. It doesn't hurt to try, right?

Note: I have had our orange flexi-rods for over 1 year now and they still work great!


Edit: I googled "Response Twist Rods" and *this* website came up. They cost a little more than what I pay for them, not sure how much shipping is but I thought I would post it anyway. Another edit: They are located in London so shipping is probably a little high. Sorry!

Friday, June 25, 2010

Bantu Knots and Box Braids

Photobucket

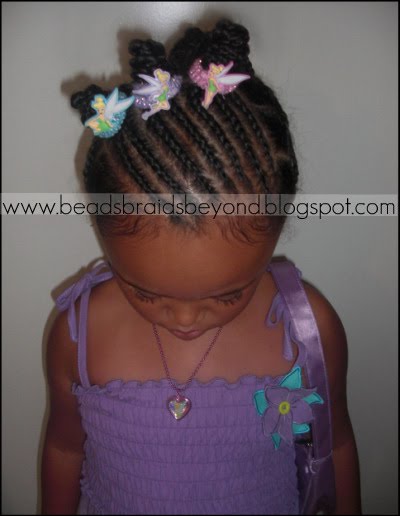
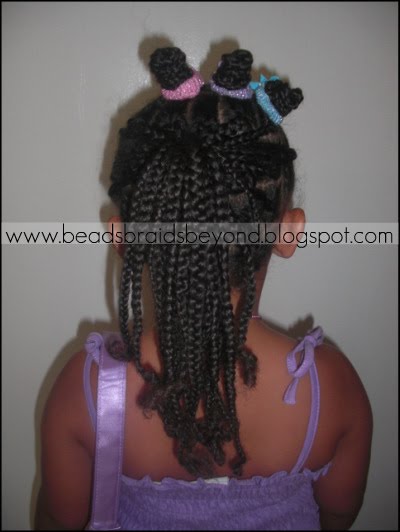
Let me start by saying A is not a fan of bantu knots all over. When I first did bantu knots all over her head last Summer she wanted me to take them out because she thought she looked like a "dinosaur with horns" and kept calling the bantu knots horns all day (kids...). That's unfortunate because I think bantu knots look adorable on little girls.

I decided to switch up her Slanted Cornrows and Natural Box Braids style a couple of days later. First I added some Bee Mine Beeloved Hair & Scalp Moisturizer to her hair then all I did was make bantu knots out of the braids hanging down from her cornrows. With the 7 braids I made three bantu knots and tied them off with some cute Tinkerbell ponytail holders, I put her box braids in one ponytail. She had the whole Tinkerbell get up (dress, sandals, jewlery, purse) so it looked really cute! She LOVED it! I'm happy to know now that I can do a few bantu knots here and there in her styles without her thinking she looks like a dinosaur, lol. Making a bantu knot is really simple, you just take the desired amount of hair (or braids/twists) and start twisting the entire section around placing it near the scalp, the ends will wrap around/under the bantu knot. A ponytail holder is not necessary but it will provide better hold.

Photobucket

Photobucket

Today is the LAST day to enter the Sidewinder Hair Holders Giveaway! There will be our winners.

You have another week to enter the Blended Cutie Giveaway! One follower will win their choice of 3 full size Blended Cutie products.

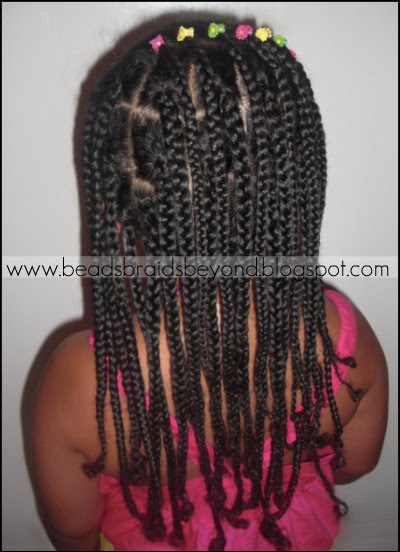
Slanted Cornrows and Natural Box Braids

Photobucket


Instructions:
  • A's hair was washed with Bee Mine Products and moisturized with their luscious moisturizer. I banded her hair in 4 sections for about 2 hours so it was slightly stretched out when I started.
  • I took the top two banded ponytails out to begin parting where I wanted the cornrows. In the photo below you can see exactly how I parted the hair, just follow the arrows.
  • Photobucket
  • After parting the section of hair I wanted out, I tied off the rest of the hair to get it out of my way. I added more luscious moisturizer to that section, focusing on the ends, and removed any knots or tangles I felt with my fingers.
  • I began parting hair for cornrowing. I started on the left side of her head, parted my first slanted cornrow. I added Bee Mine Curly Butter to the section, gently brushed with the Denman brush, then started cornrowing.
  • I continued parting the slanted cornrows, adding curly butter to each section, and cornrowing.
  • After I was done cornrowing I started making large box braids. People use different methods when parting box braids. I use several different methods. Most of the time I just go with the flow, however I feel like parting, that's how I part. This time I started in the back. I parted straight across by the nape area. I split that section into three and braided three box braids.
  • After that I went to the left side of her head. I just started parting straight down all the way around her head. So she had one box braid infront of her left ear, then two box braids right by her left ear. I continued parting straight down so as I went around her head the sections for larger so she had three box braids in the next section, etc. You can use your own method when parting box braids. Just start parting out the boxes where ever you want them and it will all come into place.
  • I added some adorable tiny flower jaw clips to her cornrows (review soon!) and that was it.

Photobucket


Maintenance:
  • Remove accessories before bed.
  • Moisturize as needed (probably every night or every other night), focus on the ends.
  • Spray braids with Bee Mine Juicy Spirtz every other day.
  • Sleep with satin bonnet.

Photobucket

How is your child wearing their hair this week?