Monday, July 5, 2010

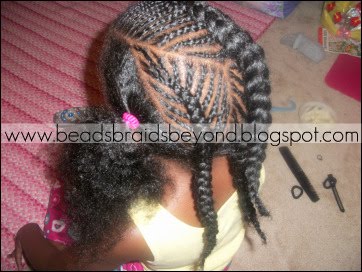
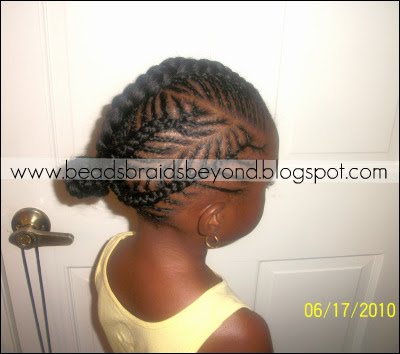
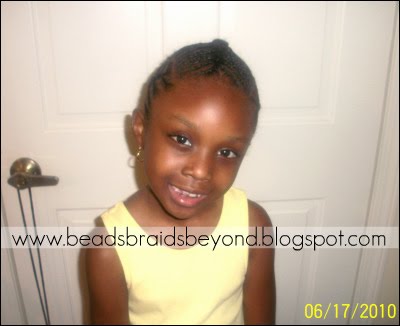
Step-by-Step Fish Bone Cornrow Tutorial

Photobucket

Photobucket

Photobucket


I will use the words braid/cornrow interchangeably.
Total Time: 3+ hours with breaks
Products used:
  • Goody’s Ouchless bands
  • Shea butter
  • Clips (I had to use these on certain sections)
  • Combs (regular – for parting and a wide-tooth comb)
Steps:
  1. Start with clean, detangled hair
  2. Photobucket
  3. I separated the hair into 5 sections. I secured each section with Goody’s Ouchless bands. There is one section on top, one section on each side and two more sections in the back.
  4. Photobucket
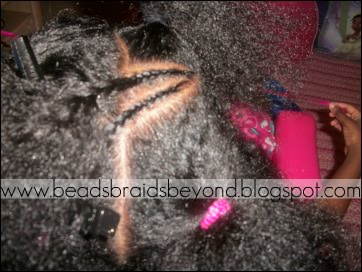
  5. I began with the top section. I separated the top section into 2 separate sections and began braiding. I made small parts because I wanted small braids. The braids are going towards the part that I made in the middle of the top section. Oh I should add that I used shea butter while braiding her hair.
  6. Photobucket Photobucket Photobucket
  7. When I finished that part of her hair I began on the other side of the top section. Once again the braids were going towards the part that I made in the middle of that section. I made sure to line the braids up with the other braids that I previously did. I ended up with 24 braids in all in the top section.
  8. Photobucket
  9. I did not braid the hair together on top yet because I needed the hair out of the way. I secured the braids with an ouchless band until I was ready.
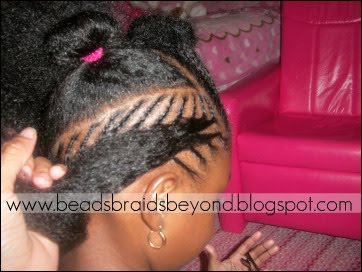
  10. I began to braid the side section. Once again I separated the section into 2 parts. I made the first conrnrow in that section in the middle (kind of at a point). The part that I made is behind this particular braid. I began braiding one side after I secured the other side with an ouchless band. I continued making small parts in her hair until I was done with that section. I did the same thing with the other part of that section.
  11. Photobucket Photobucket Photobucket
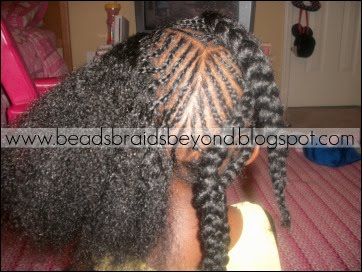
  12. While I was braiding her hair, I did not braid all the way down. I did braid too much of the hair in some sections so I had to undo them. I did not want the hair braided all the way down. I went back and made sure that the braids were loose so that I could cornrow the braids together.
  13. Photobucket Photobucket
  14. Next, I began on one of the back sections. I continued with the same steps (separating the hair into 2 section, securing one side, and braiding towards the part). I did the same on the other side until I was done. I undid any braids that needed it and I cornrowed the braids together.
  15. Photobucket Photobucket
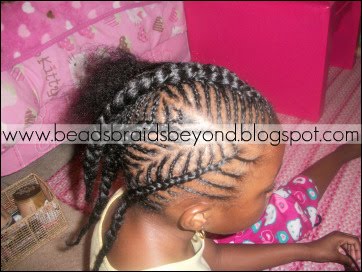
  16. Now I was ready to cornrow the top section. Once again I undid any braids that needed it and cornrowed both sides together.
  17. Photobucket Photobucket
  18. I started the other back section and followed the same steps.
  19. Photobucket Photobucket Photobucket
  20. I started my final section – the section on the side. I followed the same steps as previously stated until I was done.
  21. Photobucket Photobucket
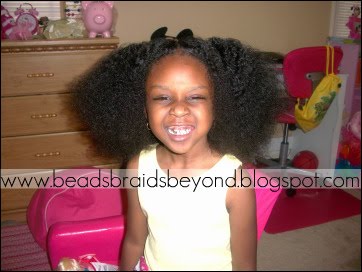
  22. I gathered each braid together and secured them with a black ouchless band. I wrapped the hair into a ball/bun and secured it with another black ouchless band.
  23. I added a pink flower to dress it up a bit.

Photobucket

Photobucket

Photobucket

Sunday, July 4, 2010

Triangle Banded Ponytails For The Fourth Of July

Photobucket

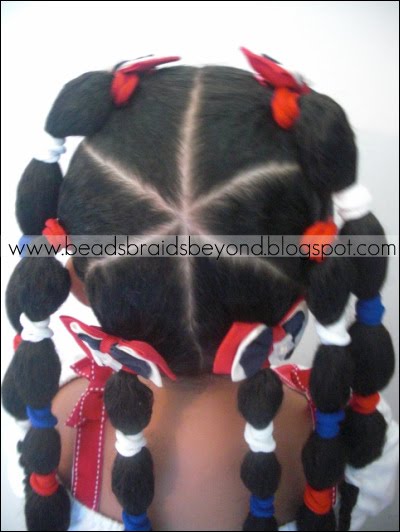
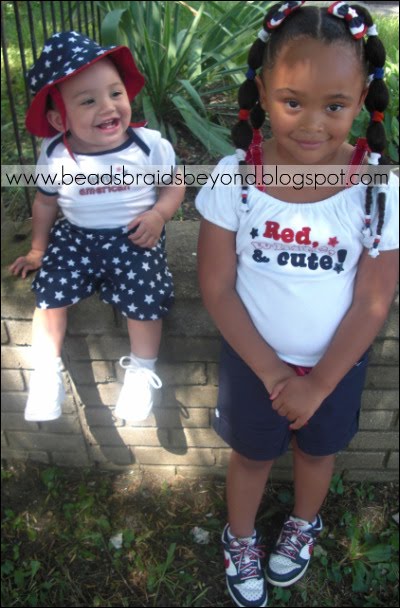
I decided to do banded ponytails for A's 4th of July style. I was going to cornrow her hair in layers but wanted something that wouldn't take a lot of time. I like the outcome. I think the parts kind of make it look like a star, and when I was looking at the pictures I thought her ponytails kind of looked like falling fire works because they were so colorful. Hope you like it!

The sun was in her eyes in this video. She was in a hurry (can you tell?) because she wanted to ride her bike. lol


Photobucket

Photobucket


How we acheived this look:
  • I shampooed A's scalp on Friday with Organix Coconut Milk Shampoo
  • After rinsing the shampoo, I conditioned and detangled A's hair with Bee Mine Conditioner. I finger detangled each section first, then combed through with a wide toothed comb.
  • After detangling each section I braided it up so it didn't tangle back up. I had about 4 sections total, so 4 braids. I rinsed the conditioner out while the 4 braids were in. See A's Hair Care Routine for more info on that.
  • After washing and detangling her hair was done, I removed each braid and added Bee Mine Deja's Hair Milk (review soon!) I banded her hair in 6 sections using Faded Glory Ponytail Holders. I spaced them half inch to an inch apart. When I got to the ends of each banded ponytail, I applied some Bee Mine Luscious Moisturizer and braided up the ends.
  • On Saturday evening I took down each banded ponytail, added more Bee Mine Deja's Hair Milk, gently brushed through with our Modified Denman D3 Brush, then banded the section back up. I added Bee Mine Luscious Moisturizer to her ends and braided the ends back up again. I did this to all 6 banded ponytails. This is what gave her final 4th of July Triangle Ponytail style a more smooth look and allowed her ponytails to hang a bit more.
  • I styled her hair today (4th of July), it took about 20-30 minutes total. I took down each section, gently brushed through with our Modified Denman Brush then I began making the triangle parts. Her hair was already split down the middle so I started in the middle of her part and parted each triangle. I tied each section off with a ponytail holder until I had 3 triangle parts on each side.
  • I used Bee Mine Curly Butter to smooth her edges down and to smooth each ponytail down, then I used Faded Glory Ponytail Holders to band each section, alternating the colors, red, white and blue. I braided the ends down and added some red, white and blue beads, with one white star bead on each braid. I also added last years Gymboree 4th of July bows to the front and back ponies.

Photobucket

A couple of pictures of A & Lil Man:

Photobucket

Photobucket

ATTENTION: Thought the red would get your attention. :P lol. I would like for next weeks Hair Share to be 4th of July themed. So if you have any patriotic hair styles or pictures, or just any pictures from the 4th of July please make sure you send them in! :) beadsbraidsbeyond@yahoo.com

Friday, July 2, 2010

Introducing Guest Blogger: Aisha

Photobucket

Photobucket
Aisha's daughter, Anisa.

I am very excited to introduce you all to our very first guest blogger, Aisha. You may remember Aisha's beautiful daughter Anisa from several different Hair Share's, Diva Spotlight, and she was the first place winner of the Protective Styling Challenge. Not only does Aisha take great care of her daughter's hair, but she's also very creative. I hope you find Aisha's posts helpful, I also hope to learn a thing or two! She will be posting weekly/biweekly, or however often she has a new post for us! Stop by Monday for her very first step-by-step instruction post.

I asked Aisha to type up a bit about herself, read below.


__________________________________

Photobucket
Guest Blogger, Aisha.

Hi my name is Aisha. I am a natural mom of two beautiful kids - Anisa (6) and a darling baby boy. I have been natural my entire life thanks to my mom, who was also natural her entire life. I usually wear my own hair in simple styles - puffs, braid outs, wash and goes, twists, and it is worn straight sometimes. Although I only had experience with natural hair, I did not have an interest in children's hair until Anisa was born. I eventually taught myself how to braid by practicing on her hair. Now I can't get enough lol! I want to continue to learn about natural hair and continue to show my creativity.

I've tried several products on my own hair, as well as on Anisa's. I've also made the mistake of trying products that weren't healthy. It's really just trial and error. I've found that I enjoy using the following products:


  • Carol's Daughter Hair Milk
  • Carol's Daughter Healthy Hair Butter
  • Carol's Daughter Loc Butter (for box braids)
  • Coconut Oil
  • Shea Butter
  • Herbal Essence Hello Hydration Shampoo/Conditioner
  • Deva Curl No-Poo Cleanser
  • and my new favorite products come from the Bee Mine line:
  • Bee Mine Juicy Moisturizing Daily Spritz
  • Bee Mine Bee Loved hair and Scalp Moisturizer
  • Bee Mine Bee Hold Curly Butter
  • Bee Mine Luscious Balanced Cream Moisturizer


I hope that you enjoy the instructions/tutorials. If you have any questions about a particular style, please leave a comment.

Photobucket

Photobucket