Showing posts with label flat twists. Show all posts

Thursday, January 17, 2013

Little Girls Natural Hairstyle: Flexi-rod Set & Flat Twists on 4b Hair


I've been getting a lot of inquiries on how to do a flexi-rod set on 4b natural hair so I decided to try a super cute age appropriate style on Miss A's cousin, Ky! This hair style is adorable for any little girl and will work on every hair type!

Instructions:
  • I began by washing and detangling Ky's hair. I moisturized with Bee Mine Luscious Moisturizer and banded her hair overnight as I always do before doing flexi-rod sets. Click here for our Banding F.A.Q. post.
  • The next morning her hair was stretched enough to begin styling to I parted her hair from ear to ear and tied off the back section.
  • I parted a section of hair to begin creating the flat twists on the top. See pictures below to see how I do my flat twists.
How to flat twist natural hair:
Step 1: Part a section of hair. In the front of that section part off a small amount of hair and separate it into two pieces.

Step 2: With your two small pieces of hair, begin twisting each piece around the other. As you cross each section over, grab a tiny bit of hair off of the scalp. Keep your fingers as close to the scalp as possible. Continue until you reach the end of the flat twist.

Please note: I used Bee Mine Curly Butter on each flat twist.
  • After flat twisting the top section I began adding the flexi-rods. I decided to use CURLS (for Target) Control Paste on her particular hair type. I grabbed a flexi-rod and after applying a generous amount of the control paste to each 1-2 inch section of hair I began rolling the rod starting from the end of each section and working my way up. I made sure I firmly rolled her hair onto the rod to give it the desired curl I wanted. See pictures below.


Fold the remaining rod over


All done! I left the flexi-rods in for a little over 1 hair and gently removed them by unfolding and unrolling at the ends first, working my way up. I decided not to separate the curls and leave them as is.


Ky absolutely loved her hair! This was her first flexi-rod set and she was so excited to show it off. I feel so blessed to see the excitement on her face when she has a brand new hair style. Her mom typically does her hair in braids and beads so for her to be able to come to my house and with mom's permission rock an afro for the first time or a flexi-rod set is just amazing.

Again, if you're interested in using Bee Mine Products (we've been using them for years) don't forget we have a reader discount code for 10% off your purchase! The code is BBBSPRING and you can only use it at www.beemineproducts.com If anything, I highly recommend their luscious moisturizer! My personal fav.

I look forward to bringing you more hairstyles on different hair types. If you like this post please feel free to share on Facebook, Pinterest or any of your favorite social media websites.

I have been seeing so many amazing hairstyles on there lately and I really want to start doing "Facebook Shout Outs" here on the blog again so make sure you post your pictures!

Sunday, November 11, 2012

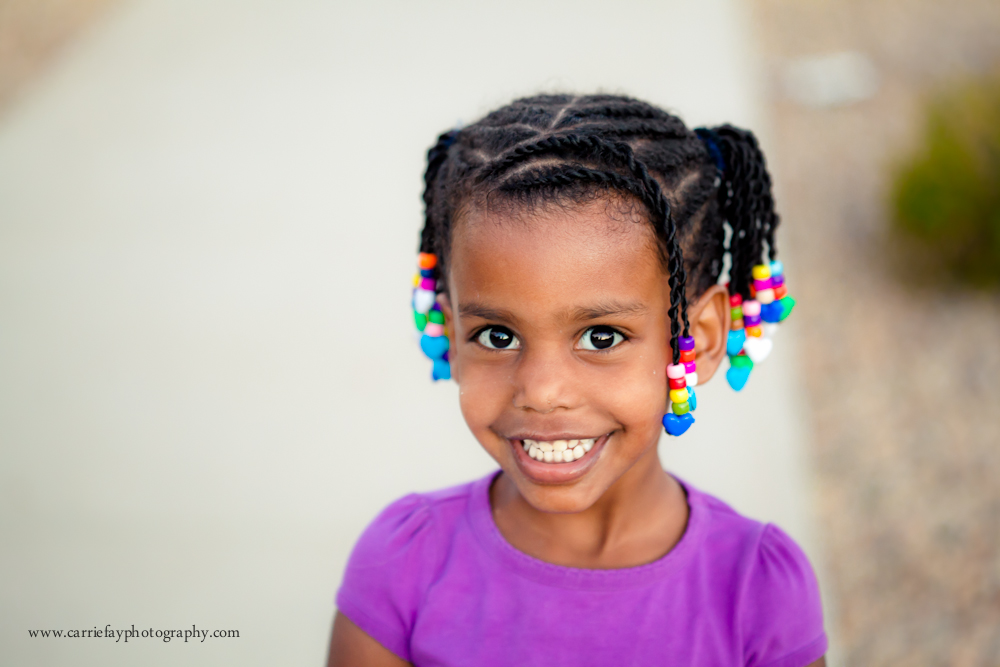
Little Girls Natural Hair Style: Flat Twist Ponytails with Twisted Bangs & Rainbow Beads


By: Carrie Fay of Amaro Baby

With hair as amazing as Violet's, it's easy for me to get carried away with new styles.  Sometimes I lose track of the fact that my daughter is only 3 years old and does not (in my opinion) need to look any older thanks to the too-fancy styles that I can't seem to resist.  So it's refreshing when we find those styles that are simple enough for me to do, sturdy enough to last a week or two, and CUTE enough to make her look like the adorable 3 year old that she is.  

This is one of our "go to" styles:  Flat twist ponytail(s) with twisted bangs and rainbow beads.  


Flat twists have always worked better on Violet's hair than cornrows for keeping the fuzzies away, and some type of bangs just seem to suit her.  It adds a feminine touch and protects her hairline better.  Beads aren't something we normally do, but when we do them, it's usually a "color explosion" kind of thing.  (Once, my five year old son asked me, "Can we just put Violet's hair back the way God made it?  You know, with rainbow beads??")

We opted for heart snaps at the end of each twist this time.  Last time we did beads, we used rubber bands and saw a bit more breakage on the ends than I would like to see.  Snaps fall out occasionally, but I'd rather that than cause damaged hair.  


Anyway.  This is our style for the week.  The pigtails and colors suit her fun personality and her age.  And most importantly, Violet is a happy camper.  She loves her rainbow beads, skipping and jumping around the house to feel those pigtails swinging (and as a direct result, we can hear every. single. step she takes... another wonderful perk of a head full of beads!).  

Have a great week, everyone!  


Tuesday, June 5, 2012

Natural Hair Updo: Cinnabuns & Flat Twists


She's back! Miss A's older cousin, Ky! You can check out some of Ky's previous styles done by me here (flat twists into afro), here (side swept two strand twists), here (cornrows and twist out) and here (side cornrows with two strand twists).

This style may look familiar to you because I did a very similar style on Miss A back in March. See this post for pictures and details. Ky saw a picture of Miss A with her hair like that and told me she wanted the same so I got to work.

First, I washed Ky's hair with Cara B Naturally Shampoo and conditioned with V05. I detangled her wet hair with a Denman brush while the conditioner was still in. After rinsing I immediately applied a generous amount of Bee Mine Luscious Moisturizer to her wet hair and banded her hair into 4 sections. Click here for our banding F.A.Q. post. 

The next day, when her hair was completely dry, I gently removed the bands and began by parting her hair from ear to ear, I tied the back section off to get it out of my way then parted the top section straight down the middle tying one side off. I began the style by parting up towards the middle, I stopped about an inch or so away from the middle part. I wanted to have a nice gap between the flat twists to create the cinnabuns in the middle. After flat twisting that section with Bee Mine Curly Butter I moved on to the next section, parting straight up towards the middle again. I secured the end of each flat twist with a rubberband dipped in extra virgin coconut oil. I created 5 flat twists on each side making sure I stopped about an inch or so away from that middle part. If you don't know how to flat twist, it's very simple. You are simply parting a small bit of hair off from your section and splitting it into two, begin twisting the right over the left while grabbing a little hair evenly across and adding it to each section.

Once I finished the flat twists I moved on to the fun part- cinnabuns! To create these super cute buns I parted a medium sized section of hair and very loosely tied it off with an ouchless ponytail holder. I then began taking the entire section and rolling/twisting it all to the left, holding it straight down infront of her face. Place your finger on top of the section and begin twisting the hair (make sure you have a firm grip so it doesn't come undone) flat on to the scalp around the ouchless ponytail holder, tuck the ends under the bun. Take one bobby pin and place it flat, right through the cinnabun and you're all done! Continue this process until you have lots of little cinnabuns on top. I wanted her cinnabuns to be thick with a little texture so I only added a little curly butter and loosened them a bit once they were all in. You can make your cinnabuns bigger or smaller, whatever floats your boat.


Now, for the hair in the back I had her sit in a high chair and bend her head down. I added a generous amount of Bee Mine Curly Butter and began doing one large flat twist up into the area where the cinnabuns are. I loosely tied the flat twist off with a rubberband and created another cinnabun with the left over hair.


She loved this style and said she felt so fancy! She was worried that her hair may not have been long enough for the style but I assured her we would make it work and it turned out fabulous!

If you are interested in trying Bee Mine Products, don't forget we have a reader discount code! The code is SPRINGBBB for 10% off your purchase only at www.beemineproducts.com

Don't forget to "LIKE" us on Facebook! Our friends on Facebook always get the first look at styles before they even hit the blog. We have a very supportive community and love hearing from you all!


Sunday, June 3, 2012

Flat Twists into Afro


You may remember Miss A's older cousin, Ky, from a few past posts- here, here and here.

Ky came over with her hair in a few large twists so I decided to give her a quick style before we headed out.

I started by spraying her hair with water and adding a fairly generous amount of Bee Mine Luscious Moisturizer all over her hair. I detangled with a Denman brush, this only took a few minutes because her hair wasn't very tangled. I then parted the top section of her hair from ear to ear and tied off the back. I parted the top section straight down the middle and got started on the left side of her hair. Using a metal rat tail comb, I parted near her left ear at an angle and began doing a basic two strand flat twist. Simply part a small amount of hair at the beginning of the section you are twisting, split it into two and cross the right piece over the left piece, pinch off a small amount of hair evenly across and add it to your new left section. Continue pinching off a little hair, adding it to each section and cross over until you get to the end of the flat twist. Keep a good grip on the end of the flat twist so it does not come undone. I decided to secure the end with a rubberband dipped in extra virgin coconut oil. I continued this process until she had a total of 6 flat twists on top.  I fluffed the back of her 'fro and viola! All done!

This was Ky's first time wearing her afro out. She really liked the style but was worried about what others would think. I told her that her hair is absolutely beautiful just the way it is and she should never be ashamed of it! :-) She got so many compliments on her style and at the end of the day she told me she really likes afros now. I cannot express the joy I felt when I heard that, it totally made my week.

If you are interested in trying Bee Mine Products, don't forget we have a reader discount code especially for you! Get 10% off your purchase using code: SPRINGBBB www.beemineproducts.com Happy Shopping!

Don't forget to "like" us on Facebook! :-)


Saturday, May 26, 2012

Flat Twists into Side Ponytail

click to enlarge

Just a quick 'do. Two strand flat twists going into side ponytail.

School is out in about a week so expect many more updates to come. :-)

Tuesday, March 27, 2012

Natural Hair Styles for Little Girls: Cornrows & Twist Out - Flat Twists & Twist Out

Click pictures to enlarge
Miss A had some of her cousins over this past weekend and I was pleasantly surprised when they asked me to do their hair! Even the little 3-year-old! I mean, what 3 year old do you know who actually wants to sit still to have their hair styled? I know my soon-to-be 3 year old son wants no part of hair time. 

I styled Miss A's older cousin first. She is 9 years old and really wanted to wear her hair out and curly. I washed her hair with Kinky Curly Come Clean Shampoo and conditioned with Bee Mine Daily Moisturizing Conditioner. After I rinsed the conditioner I applied a generous amount of Bee Mine Luscious Moisturizer to her hair, focusing on her edges and ends. I began by parting the first section of hair to cornrow near her right temple. Using a metal rat tail comb, I parted at a slight angle. I applied a small amount of Bee Mine Curly Butter to each section before cornrowing for a little hold. I loosely tied off the end of each cornrow with a black rubberband. I cornrowed a total of 6 sections. Every 2 cornrows, I applied a small amount of Bee Mine Curly Butter and twisted the loose hair together. After I finished the top I just used my fingers to grab a medium amount of hair and twist them together, once again, using Bee Mine Curly Butter. 


The next morning I removed the two strand twists and these are the results (below). I love how it turned out! This was her first time ever wearing her hair out like this so she was very excited.

Below is Miss A's 3 year old cousin. She wanted me to do her hair like her "sissy". I decided to keep it quick and simple. I parted small section of her hair and decided to do flat twists instead of cornrows because her hair is on the fine, thin side. I used Bee Mine Curly Butter on her hair as well. I twisted the rest of her hair and removed the twists in the A.M. Below are the results. :-) 


Miss A was also wearing a twist out. I used Bee Mine Curly Butter on about 8 large twists. 

Don't forget, our Bee Mine Discount code is still good through the end of this month (March). The code is BBBJAN and you will receive 10% off at www.beemineproducts.com

I hope you enjoyed this post! :-)

xoxo, Nik
Don't forget to "like" us on Facebook! CLICK HERE!

Sunday, August 14, 2011

Flat Twists to the Side


This is a fairly simple style incorporating flat twists and regular two strand twists. I was inspired by this style by AfrikanHairGod. This is perfect for back to school. Your daughter can wear her hair like this one week and a twist out the next week.

The style is pretty basic as long as you know how to do flat twists. I began parting on damp hair near her left ear all the way back. I applied a little Darcy's Botanicals Madagascar Vanilla Styling Creme to each section then applied a little Darcy's Botanicals Organic Coconut Butter Styling Pomade on top of that. Her hair was already detangled so I just brushed through each section with our Denman D4 brush to distribute the product evenly. For flat twists, after you part the section you want to flat twist, grab a little bit of hair in the front, split the section in two then twist the two around once or twice, then hold your right section down towards the scalp, grab a little bit of hair, add it to that section, then cross the section over to your left, your left section now becomes your right section, hold it down towards the scalp, grab a tiny bit of hair, add it to that section, then cross over. Continue this process until you get to the ends. Right now I'm using a rubberband at the end of each flat twist to make sure it stays put. I only wrap it around 3-4 times, not tight but just enough to make sure the flat twist doesn't become too loose. I flat twisted three sections straight back then moved to the top where I began flat twisting at an angle going to the right. I'm still working on my flat twists to they are not perfect by any means. After I had all the flat twists in I grabbed large sections of the remaining hair, added the Darcy's Botanicals products and twisted until I was done. The entire style took about an hour and a half.

Miss A doesn't start school for another week so unfortunately this will not be her back to school style. I'm still not sure what we're doing for the first day of school. How will your child wear their hair on the first day of school?


Saturday, August 13, 2011

5 Flat Twists with Braid out


Miss A had her soccer pictures today so I wanted to do a quick but cute down style. I decided to incorporate a few flat twists going to the side in the front with a braid out. First, I parted a square on the top and sections that off. I grabbed large sections with my fingers, wet the hair then applied some Oyin Whipped Pudding, brushed through with a Denman D4 brush and braided. I did this until she had 5 braided sections. When I got to the top section I parted off in the beginning, I used a pintail comb to make straight parts going to the left, I added a little Oyin Whipped Pudding and flat twisted 5 sections until I was done. Flat twists are pretty basic, just part a small section of hair in the front, split it in two and begin twisting each section around once or twice, you will then start picking up a little bit of hair and adding it into each section, twisting around one another the entire time. I tied each flat twist off with a rubberband to make sure it stayed put overnight. Her braid out was a lot more defined when I first took the braids out but after running around outside it got a little poofy. Still very cute. Perfect picture hair, back to school style, etc.


Saturday, May 7, 2011

Flat Twist/Bantu Knot Out Inspired By Naptural85


I've had Naptural85's How To Bantu Knot Out video favorited on Youtube for quite some time now. I decided to try the style last night at the last minute. I styled on wet hair and only used Bee Mine Luscious Moisturizer (by the way, they are having a Mother's Day Sale tomorrow! Use code: BBBMOM for 15% off your purchase). I parted in random sections and detangled with my fingers and a comb. The entire process took maybe 30-40 minutes. The next morning I removed her satin bonnet and took the bantu knots out. Her hair, especially the back, was still quite damp but I went ahead and took the twists out anyway. Next time I will work on slightly damp hair because bantu knots take entirely too long to try. If I had waited for her hair to completely dry I think it would be less frizzy in the back. I still loved the results though, she loves it, too!

Check out the video from Naptural85. Her hair is gorgeous!


Thursday, April 21, 2011

Beaded Half-Hawk Style


I asked AfrikcanHairGod if I could post this amazing style on the blog and he agreed. Check it out! I can't wait to try it. He has some serious flat twisting skills! Make sure you stop by his youtube, subcribe and check out his other videos!

Tuesday, June 15, 2010

Flat Twists and Big Hair

Photobucket

Get the look:
  • First go *here to see how I detangled her hair after removing her cornrows.
  • All I did was add some Bee Mine Beeloved Hair & Scalp Moisturizer to her hair and fluffed her hair with my fingers, also gently removing any tangles I may feel with my fingers.
  • I parted a small section of her in the front middle part of her hair to begin flat twisting. I added a little more Bee Mine Beeloved Hair & Scalp Moisturizer to each section first.
    • Part a small section of hair out in the front. Split into two pieces.
    • Pinch a little hair off with your thumb and index (pointer) finger, add it to your right piece, then cross your right section under your left section.
    • Pinch a little hair off with your thumb and index finger, add it to your (new) right piece, then cross your right section under your left section.
    • Continue pinching hair off, adding it to your right section, then crossing under your left section.
    • Pinch, add, cross, pinch, add, cross.
  • I did a total of 4 loose flat twists in the front and secured them with cute little flower claw clips.

Photobucket

Figuring out where she wants to head first. Swings or slide?
Photobucket